Thursday, December 31, 2009

Rosemary Parmesan Crackers

Adapted from Parmesan Cream Crackers by Mark Bittman
2 cups flour
1 tsp kosher salt
1 cup packed and grated Parmesan cheese
1 stick unsalted butter
1/2 cup cream
2 tsp finely chopped rosemary
1 tsp each: ground pepper, nice flaky salt for sprinkling

Pre-heat oven to 400°. Pulse flour, salt, cheese and butter in a food processor until combined. Add the cream and let machine run; adding more cream if needed, a teaspoon at a time, until mixture holds together but is not sticky. Divide dough in half and roll out on a lightly floured board until 1/8" thick. Carefully transfer rolled out dough to Silpat (or parchment) lined baking sheet. Sprinkle top of dough with sea salt, ground pepper, and chopped rosemary. Pat toppings lightly with hands. Bake until lightly browned, about 15 minutes, rotating pans half way through cooking time. Cool on a rack. Serve warm or at room temp.

My Notes: These are not as crispy as I was hoping for, but they sure taste good and were quite easy.

Pick A Peck Of Pretty Pink Peppers

After reading this article about pink pepper-berries, I couldn't wait to see if there were any growing at my Mom's house when I visited for Christmas. Just off the back yard, there is a huge and graceful Peruvian pepper tree. That's where my tree-house was when the tree and I were much younger, but I don't ever remember there being pink berries on it.

Turns out that these trees bear little or no fruit if there are not enough female flowers present. Since I've been away though, there has been a new Brazilian pepper tree growing under and among some other plants by the fence, stretching way up high for a bit of sunlight. And there were pink berries on it. Not a lot, but a few.

This scrawny lanky "tree" was a volunteer in the yard, and though I didn't pick a peck* of pepper-berries, I did manage to reach a couple clusters. Next time we'll need to get the ladder out. With these rosy little foraged berries, homemade crusty bread, and some goat cheese, we'll be all set for New Year's Eve! Now if only I had the thyme...

Pink Pepper Goat Cheese Spread

My Notes: This couldn't have gone together easier. I split the goat cheese between two shallow 4 oz. ramekins (truth be told, they were from Trader Joe's frozen créme brulée). No fresh thyme was available, so I used some that I dried myself from our old garden before we moved. The spread smelled fantastic coming out of the oven and tasted great smeared on the homemade bread. The honey really countered the pepper berry perfectly. As easy as this is, I love that it can be made ahead of time and kept in the fridge. Let's see: it's super easy, really tasty, not your average party offering, and it's pretty too. Most definitely a keeper.

*Ever wonder just how many peppers were in that peck that Peter Piper picked? Click here to find out.
Peruvian Pepper Tree (Schinus molle)
Brazilian Pepper Tree (Schinus terebinthifolius)

Monday, December 21, 2009

Blackberry Lemon Redemption Cookies

Blackberry Lemon Redemption Cookies
First of all, these treats were named by my Hubs. I had wanted to call them Reincarnation Cookies or Resurrection Cookies, or even Recycled or Repurposed Cookies. Hmm... How 'bout Metamorphosis Cookies? His idea trumped them all for its sweetness, appropriateness, and positive once-bad-now-good swing.

You see these cookies are the final reward for my Blackberry Pâte de Fruit from last summer. I'd saved it, ate one or two sticky globs, but there wasn't much to be said for it. Except that it was a big fat fail. Disastrous, yet still edible. It was thick, gooey and crunchy (the sugar that it was rolled in had been absorbed but not dissolved), beyond jam but not quite candy. But still there was that incredibly intense blackberry flavor that I couldn't turn my back on. So there it sat in an airtight container in the fridge. In limbo.

Sunday, December 20, 2009

(Hazy Shade Of) Winter Cookies

These cookies are the color of my mood. They are mood-cookies. Did you ever have a mood-ring? I did. When I was in elementary school. I quickly figured out its secret. It was sensitive to heat and would change colors as your body temperature fluctuated. I was a skinny little kid though and most of the time my ring only turned dark blue. That's the first color it would go to beyond the default black. If I rubbed my hands together (or put them under warm water), the ring would change to all sorts of lovely teals and amber colors. But it didn't really tell my mood. These cookies though? They are doing just that.

It's five days before Christmas and two days before we leave to go visit family. Everything must be finished in the next two days or it doesn't get done at all. This is a time when I realistically reevaluate everything on my to-do lists and drop the things that are not going to get done. This generally drops my mood exponentially. And so I've discovered that it's not the best time to bake cookies.

Baking is all about the love. And if you're not feeling it, your end result will show it. This is not to say that all baking disasters are the result of a poor mindset. Just that, if you start out that way, it'll show in the final product. Baked goods are empathic. Thus, my mood-cookies: I'm feeling muddled and depressed, the skies outside my window are dark and cloudy, my cookies are muddy gray lumps.

I was sure that I'd created baked-bads instead of baked-goods. But they say that every cloud has a silver lining, and I've always found that to be true. The silver lining of these cookies is that they are really quite tasty, and they go splendidly with tea. They are, in fact, our new favorite tea cookie. They are, in a word, lovely.

Quiz time! Finish the following sentence: Beauty is... a) as beauty does. b) in the eye of the beholder. c) only skin deep. d) vastly overrated. e) all of the above. Substance really is so much more important than appearance. The trick is to find your own real and genuine happy-place and then get baking. If you're happy and you know it, then your cookies will surely show it.

Buttery Jam Cookies from Joy The Baker

My Notes: Accidentally put the eggs in before the sugar. Oops. Used my Triple Berry Jam that I made last summer. The dough turned a lovely shade of mauve. Oven was running on the hot side so the trays sat out waiting for an extra 15 minutes or so while I tried to adjust the oven temp. It dropped too much and the first batch took an extra 5-6 min. since the oven temp was still around 350° for most of the time they were in there. Bah. The mauve-ness made it hard to tell when they were browned. 

They smelled good when I took them out of the oven but they didn't flatten out all the way (maybe due to the temp. problem). And they were a somewhat unappetizing shade of gray now. Don't know if these are going to make it as gifts (as intended) or not. Next time I'll try swirling the jam in last so it doesn't permeate the dough so thoroughly. I also flattened the last few dough balls before baking them to see if that would help... It did. Next time I'll try all that and increase the ginger and jam quantities.

Empathic: Sharing another's feelings as if they were your own.
Answer:
e) all of the above.

Friday, December 18, 2009

Quoting... Dodie Smith

"I thank heaven there is no cheaper form of bread than bread." 
- Dodie Smith, I Capture the Castle, 1948

Pan co'Sante (Walnut Raisin Bread)


No-Knead Walnut Raisin Bread from Jim Lahey via The Kitchn
My Notes: Did not have bread flour, so I used AP instead. Initial rise was 15 hours in oven overnight with light on. Used the parchment paper method from CI instead of the floured dish-towel method used in the recipe. Did not knead it at all. I slashed the top before baking. Not sure if oven was to temp. Didn't get the rise it should have had. Will try again with a little bit of kneading, and a higher initial temp. Smells and tastes great regardless!

Saturday, December 12, 2009

There Is No "P" In Granny Smith*

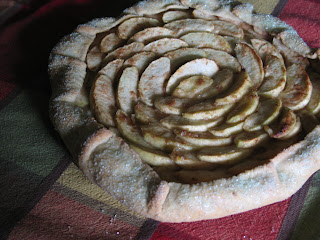
apple crostataThe rain we were promised earlier in the week finally materialized (and how!), we were snug and warm indoors, and there was a round of pastry dough in the freezer. An apple crostata would be something new, yet also comfortingly familiar.

By now, my friends are probably wondering if I know how to make anything else. How many of these have I made in the last six months? 10? 12 or more? But I've never tried apple; wanted to, but was unsure. Apples are generally firmer than peaches, plums and pears*. How would they act within this recipe? Only one way to find out.

I just finished reading an excellent cookbook/memoir**, and in it the author describes an apple pie like one I made years ago: piled high with apples going into the oven, coming out with a big space under the top crust where the apples used to be. The fruit had cooked down while the crust stayed in place. Her solution was to sauté the apples first and then pile them into the pastry.

Since this was to be an experimental crostata, I decided to try it both ways: cooked and raw, in the same crust. That's my idea of "blind baking"... I had absolutely no idea what would happen. This one wouldn't be leaving my kitchen to be foisted onto unsuspecting friends though, so nobody would be thinking to themselves, "Crostata? Again?".

Frankly, most of it wouldn't even live to see the following day. We ate it before AND after dinner, then forced ourselves to wrap the rest up and save for the following day. I just know, that with the littlest bit of encouragement, we would have polished off the whole thing. Was it perfect in every way? No. Did it look magazine-cover gorgeous? No. Did it taste really really good? Uh, yep!

My Notes: Using the Peach Crostata recipe as a guide, I first peeled and sliced the apples and tossed them with some lemon juice. Then I mixed them with cinnamon/clove/nutmeg along with a little sugar and flour. Half of the apples then went into the skillet with some butter and were cooked until soft, but not falling apart. When they had cooled off, I started layering them into the rolled out dough and filled up the rest of the space with the raw apples. The cooked apples had lost half their bulk, so the pie was more like 25% cooked apples to 75% raw apples. I brushed the crust with water and sprinkled chunky sugar over it (and yes, I'm still working that jar of pastel green sugar). 

When I took it out of the oven, the crust was totally done and the apples didn't look so hot. They had shrunk down and left a gap under the crust, even on the pre-cooked side! The raw fruit looked dry and the cooked fruit looked a little better. And maybe it would have looked fine after being brushed with a warm glaze, but that kind of negates the whole "simple rustic country dessert" feel that I was going for. Next time I'll leave out the flour, sauté all of the apples (will probably need more to make up for the shrinkage) and I'll use more butter and sugar so they'll get more caramel-y. Hopefully that should do the trick.

*Up to this point I had only made Crostati with fruit whose name began with the letter "P". Didn't plan it, just noticed it one day. I notice stuff like that.
**Confections Of A Closet Master Baker by Gesine Bullock-Prado. I thoroughly enjoyed reading this book. It was not only a lot of fun to read, it also has an artery-clogging butter-filled pastry recipe at the end of each tasty chapter! I hope the library doesn't notice that I drooled on all the pages.

Wednesday, December 2, 2009

Vegetable Stock for Free or Cheap

Recently empowered by making turkey stock (and desperately needing more space in my freezer), I decided to make some vegetable stock.

I'd been saving up veggie scraps in a big heavy-duty zip-top bag in the freezer for just this purpose: carrot ends, onion ends, chard stems, herb stems, slightly soft squash, potatoes, tomatoes, and wilted greens, among other things. Almost any vegetable scrap is fair game so long as it's not too far gone. The bag was full, so the time was now...

Vegetable Stock
Adapted from Basic Vegetable Stock, page 73, Moosewood Restaurant Low-Fat Favorites, 1996

Approximately 6 cups of assorted veggies (avoid sulfurous* ones)
1 potato, cut into quarters
2 tsp peppercorns
1 bay leaf
2 tsp thyme
1 clove of garlic, smashed
filtered water to cover
  1. Put everything into a crock-pot set on LOW for 10-12 hours. Let crock cool until comfortable enough to handle. 
  2. Put a large sturdy metal colander inside a large bowl in the sink** and line the colander with a floursack towel. Very carefully pour the contents of the slow-cooker into the lined colander. Let drain for a few minutes. Gather up the corners and sides of the towel and twist to extract more of the liquid from the vegetables. 
  3. Let the stock cool completely. Use within 2-3 days or divide into freezer containers, label, and freeze to use later. Yield: approximately 3.5 pints (7 cups).

My Notes: I divided mine into 1 and 2 cup portions before freezing. Make sure to leave an inch of space at the top of the containers to allow for expansion during the freezing process. (Oops!) From now on, I think I'll freeze them first and then add the lids.

 *These include: broccoli, cabbage, cauliflower, and Brussels sprouts. According to the original recipe, it's evidently a good idea to also avoid asparagus, eggplant and peppers. I imagine that's because of their strong flavor compounds. They must not play well with others...the little bullies.
**This way I don't have to lift the big heavy (and hot) crock any higher than necessary. There are enough dangers in the kitchen as it is. Thinking ahead and thinking ergonomically will help prevent pulls, strains and other mishaps.

Tuesday, December 1, 2009

Turkey Vegetable Soup

Two weeks ago the Hubs & I watched some Jacques Pépin episodes for the first time. It was one of those head-shaking, "Where have we been all this time?"-moments for us. The man is a total rock star! Well, the next day I was out "thrifting" with a friend and she finds a Jacques Pépin cookbook on the rack. Of course I bought it. It was all of a dollar I think. How could I not?

Yesterday I made turkey stock with that big carcass from Thanksgiving, and today I went looking for a turkey soup recipe. Imagine my surprise when I found the perfect one in my new Jacques Pépin book! Coincidence? Maybe... maybe not. Using some of that fantastic turkey stock from yesterday and armed with my rockstar cookbook, I made up a batch of turkey soup, packed with vegetables...

Turkey Vegetable Soup
Adapted from: Cooked Turkey Carcass Soup, page 16, Cooking With Claudine by Jacques Pepin, 1996

2 quarts Turkey Stock
1-1/2 cups carrots, sliced into coins
1-1/2 cups celery, diced
2 small zucchini, diced
3 cups baby spinach, roughly chopped
1 leek
8 oz. mushrooms, sliced
1-2 cups cooked turkey meat, chopped or shredded
2 cups egg noodles
3 big pinches of salt
ground black pepper

Put everything into a stockpot or dutch oven, except the noodles, salt and pepper. Bring to a boil, drop heat to low and cook for 20 minutes, covered. Remove lid, add the noodles and salt and pepper to taste. Cook for 10 more minutes. Serve with buttered sourdough toast. If not serving it right away, let cool before dividing it into containers. Will keep for a few days in the fridge, or a few months in the freezer. If you are not planning on serving it right away, do not add the noodles. Cook them separately and add them before serving. Otherwise, they will break down too much during the freezing/re-heating process. It will still be edible and probably taste o.k. but it won't look very good, and if you like your noodles whole... they won't be. Yield: approximately 7 cups of soup.

My Notes: The original recipe says to pick any meat off the bones after making the stock, but we picked the usable meat off the carcass before we made the stock. The meat was already cooked to perfection and I didn't want to cook it twice. Went a little nuts with the amount of veg in this soup. May have to add more stock to it when serving, to you know, make it "soupier".

Monday, November 30, 2009

Quoting... E.M. Forster


"This meat has surely been used for soup," 
said Miss Bartlett, laying down her fork.
- A Room With A View (1908) by E. M. Forster

The Ultimate Thanksgiving Leftover

The other night, we drove home after having spent a wonderful Thanksgiving with our friends. We were fat, happy, warm, and fuzzy... and we were toting the carcass of a 19-pound bird in a plastic bag. It is without a doubt, the ultimate leftover. It is also a very welcome and a generous gift. Wanna know what we did with it? We made turkey stock of course! Lots and lots of gorgeous golden rich turkey stock. It's so good, I may just have to start roasting turkeys... they really are so versatile (and much more flavorful than chickens). In the meantime, I'll just have to rely on the kindness of friends who know how much I value a roasted bird carcass, or to use the more genteel phraseology... a "turkey frame".

My Basic Turkey Stock Recipe

1 turkey carcass
1 bay leaf
2 tsp peppercorns
1 large onion, quartered
1 green apple, quartered
1 Tblsp dried rosemary
2 tsp dried thyme
1-2 pinches of other dried herbs
2 Tbsp apple cider vinegar
enough water to cover

Put all the ingredients into a large pot on the stove and simmer for 3 hours or... put in a crock-pot on low for 10-12 hours (or high for 6-7 hours). Take off heat and skim off fat and any floating bits. Remove large pieces with a slotted spoon and/or tongs, discard. Let cool some more and then pour through a mesh sieve. Optional: line sieve with 2-3 layers of cheesecloth or a flour-sack cloth. Pour stock into storage containers, label and refrigerate or freeze for later use.

My Notes: I planned to do this all in the slow-cooker, but once I got the cut-up carcass in the pot, I realized that there was no way anything else would fit (that was one big turkey!). Dumped everything into my big spaghetti pot with 4.5 quarts of water to cover, simmered it on the stove for 2 hours, then put half in the slow cooker. I continued to simmer the remaining half for another 3 hours on the stove and set the slow-cooker on high for 6 hours. By the time it had cooled down, it was late at night, so I combined it all into one pot, covered it and put it in the fridge, then skimmed and strained it in the morning. Yielded 3.25 quarts total.

Tuesday, November 24, 2009

Cranberry Orange Sauce

A not-so-very basic cranberry sauce that everybody will like... even people who say they don't really like cranberry sauce. Sections of orange give it some freshness, while the zest lends zip to compliment the zing from the ginger. Make this ahead of time because it'll give the flavors time to get to know one another and more importantly, it'll be one less thing for you to do on turkey-day...


Cranberry Orange Sauce
Adapted from: Page 206, Martha Stewart Living magazine, November 2005

Monday, November 23, 2009

Colors Not Found In Nature

"It's fruitcake weather!" I can't make these cookies without thinking about A Christmas Memory, the short story by Truman Capote. Sweet, wistful, and wonderful; one of those stories that is heartbreaking and heartwarming at the same time. So good when done well. And this one surely is. There is an old television production of it starring Geraldine Page that is excellently done. It used to air every year around the holidays, and hopefully still does. As good as that teleplay is, it's the book that always grabs at my heart the hardest. To read the words is to be rewarded. Rewarded by the elegant writing, tangible descriptions, sweet and tender sentiment... I will read it again this year. Like fruitcake, it's tradition.

My Mom used to make these cookies when I was growing up, but it's a big job these cookies. I started making them the year I got married. I'll never forget it: I bought 6 lbs. of pecans when I needed 6 cups. We put pecans in everything that year. This year I added flour in when it should have been sugar. But it all worked out. It always does, one way or another.

Twelve dozen cookies later and I was finally done. The music on the stereo came to an end and the house was suddenly quiet. I leaned against the counter, closed my eyes and bit into one of the cookies... in that one moment was the Christmas of my childhood. I heard bells chiming. Turns out they really were! There's a church nearby that plays bells every hour. It was five o'clock. My senses and memories converged, just for one perfect moment. Every once and a while that happens. Or maybe it happens all the time and I only notice it every once and a while.

Friday, November 20, 2009

Crazy Good Crock Pot Stuffing

This is what results from having to drive 5 hours away for Thanksgiving dinner with the family, not having a working oven at home, no oven-space available at our destination, and yet... still wanting to bring something homemade towards the meal. Sometimes great things are born of these situations, sometimes disasters are. This, thankfully was one of the great things.

I did all the prep the night before we left, bagged it all up according to dry, wet, refrigerated, etc. In the morning we packed it all in the cooler with ice packs, chucked the crockpot in the back of the car and hit the road.

Stuffing saves the day... after!
As it turned out, we didn't arrive in time to heat the stuffing up before dinner. But before you get all weepy and dejected (like I did at first), there was another stuffing already there (yes, I think they were just humoring me) so our Thanksgiving was not stuffing-less. The important thing to note though was that there was none of that other stuffing left at the end of the day. (Can you see where this is going yet?)

...I cooked up my well-traveled crockpot stuffing the day after Thanksgiving and there was enough to keep up with all the other leftovers for the next three days!

Crazy Good Crock Pot Stuffing
Adapted from: Perfect Homemade Stuffing Crockpot Recipe on A Year Of Slowcooking blog; and from another recipe I found on my frantic Google search but can't locate anymore*; and also from various stuffings made over the years by the fabulous women in my family.

Ingredients
1 loaf of bread, lightly toasted in the oven
1 lb. Italian sausage
1 large yellow onion, diced
1 cup celery, diced
1 cup green apple, peeled and diced
1 cup dried apricots, chopped
1/4 cup butter, melted
1/4 cup fresh parsley, chopped
1 1/2 cup chicken or vegetable broth (plus 1/4 cup, if needed later)
1 T ground sage
1 tsp ground marjoram
1/2 tsp savory
1/2 tsp thyme
1 tsp salt
1 tsp pepper

Directions
Use a 6 quart crockpot. If yours is smaller, toss everything together in a large mixing bowl, then put into your crockpot later when it's time to cook.

Toast the bread slices in the oven at 300 degrees 15 - 30 minutes, checking often. (I didn't have an oven, so I had to toast the whole loaf in my toaster, 4 slices at a time. (I do not recommend this method except in cases of extreme emergency.)

While the bread is toasting, chop up the onion, parsley, celery, apple and dried apricots. Add parsley, celery apple and apricots to the bowl or crockpot.

Crumble the sausage and brown on the stove. Remove meat from pan and pour off any excess fat. Saute the onion in the same pan just until it starts to show color.

Add sausage and onion, seasonings, and melted butter to bowl or crockpot. Stir well.

When the bread is done, cut into 1/2 inch size-or-so cubes. Add to the bowl/crockpot. Toss it all together thoroughly. Now is the time to transfer the mixture into the crockpot if you've been using a large bowl up to this point. When the bread is coated nicely, pour in 1 1/2 cups of broth. Cover and cook on high for 2 hours.

When done, the bread will have browned a little on the top and around the edges, and it will be hot throughout. It can stay on warm for another 2 hours, if needed. Stir before serving. If you'd like it a bit more moist, you can add a 1/4 cup more or so of broth.

My Notes (Thanksgiving 2008): In the original recipe there was a bit about starting the day before and combining everything on the day of. That was what really sold me on trying this.  Everybody loved it and it was completely devoured. The sausage was plenty spicy, and I think I may use "mild" next time or a combination of the two.

*Oh, I know I've got it somewhere. This is why I started this blog... to put all this stuff in one place!

Tuesday, November 17, 2009

Orange Oat Raisin Scones

Let's see, where was I? Oh yes, I was telling you about the afternoon tea I had with my friend...

Among the many delights on offer, we were treated to freshly baked scones. And ever since that day I have had scones on the brain, and it has culminated in my recent scone-fest.

Is Baking Therapy "a thing"? It really should be. I was stressed, so I baked. I was stressed, so I baked two different kinds of scones simultaneously at 4:30 in the afternoon. For no reason. Then I felt better. Repeat as necessary.

Baking Therapy.  Rx: Bake two scones and call me in the morning... we'll have tea... and we'll talk.

Orange Oat Raisin Scones
Adapted from this awesome looking recipe that I would have made except that I didn't have: whole wheat pastry flour, turbinado sugar, buttermilk, or currants... but I didn't let that stop me!

3 cups flour
1/2 cup sugar
2 tsp baking powder
1 tsp baking soda
1 cup (cold) butter, cut into pieces
2 cups old-fashioned oats
zest from 1 orange
1 cup plain yogurt
2/3 cup raisins
4 Tbsp sugar

Preheat oven to 350°. With a whisk or food processor, mix together the flour, sugar, baking powder and baking soda. Cut in with a pastry blender or pulse in the pieces of cold butter until it looks like course sand. In a large bowl, stir the butter-flour mixture with the oats and orange zest. Use a whisk if the zest is clumping. Add the yogurt and raisins and stir until it looks evenly moist.

Dump the mixture onto a cutting board and pat together with your hands, packing the dough together into a rectangle approximately 7 x 9. Using a bench scraper (or pizza wheel, or sharp knife), divide the rectangle lengthwise, creating 2 narrow rectangles. Divide each of the two rectangles into 3 squares and each of the squares into 2 triangles. You should end up with 12 triangle-shaped scones. Or pat the dough into a circle and cut it into wedges. Transfer scones onto baking sheets and sprinkle the top of each with sugar Bake for 16-20 minutes, or until tops are golden.

Notes: Very traditional crumbly scone dough. Only had pastel green sanding sugar so it looks a little odd, but, oh well! These scones are a little on the dry side, which makes them the perfect partner for butter, jam, clotted cream.... and plenty of hot tea.

Cornmeal Cranberry Scones


Last weekend a friend took me out to tea. How I love saying that! Took me to tea... maybe it's the alliteration, maybe it's because I love tea so much, maybe it's because it was such a terribly lovely surprise. It's no secret, I do so love tea. Not just the drink itself, but also the preparation of it, the vessels that hold and serve it, and the traditions behind it.

Tea is the perfect thing to drink in solitude and yet is even more enjoyable when shared with someone else. Tea can pick you up when you're down, and calm you down when you're wound up. Beautiful poured into a delicate bone china teacup; comforting drunk from a hand-thrown pottery mug. The nibbles that traditionally accompany tea offer up their own kind of comfort as well, whether dainty or rustic in nature. Some things are just so right together.

Cornmeal Cranberry Scones
Adapted from this recipe that I had torn out of an old BHG magazine but couldn't make because I didn't have: buttermilk, limes, or blueberries.

1 - 1/2 cups flour
2/3 cup yellow cornmeal
2 Tbsp sugar
2 Tbsp brown sugar, packed
1-1/2 tsp baking powder
1/4 tsp baking soda
1/4 tsp salt
1/3 cup (cold) butter, cut into small pieces
1/2 cup plain yogurt
1 egg
zest from a small lemon
1 cup dried cranberries (or "Craisins" if, like me, you couldn't find plain ones at the store)

Preheat oven to 450°. Whisk together the flour, cornmeal, sugars, baking powder, baking soda and salt (or pulse a few times in a food processor). Add the zest and whisk into the dry ingredients (or pulse a couple time in the food processor). Using a pastry blender, cut the butter in until the mixture looks like very course clumpy sand (or add it to the food processor and pulse 10 or 15 times for the same result). If using the food processor, dump the contents into a mixing bowl now.

Add the yogurt and egg and mix them together a little bit in the bowl with a fork or rubber spatula. Add the cranberries to the bowl. Working quickly, fold everything together, scraping down the side and back up with one hand and rotating the bowl with the other. Do this only until the mixture is evenly moistened. It will be wet and clumpy.

Pat the mixture into a rectangle or circle (1/2 to 3/4" high) and cut into wedges, or use a biscuit cutter. Alternatively, you can drop blobs of it onto the baking sheet for "drop scones". Transfer scones to the baking sheet and bake for 12 to 15 minutes, or until golden on top. Make the optional icing while scones cool slightly on rack.

Optional Icing: 
lemon juice
powdered sugar
sliced almonds, toasted

Put 1/2 cup to 1 cup of powdered sugar in a small bowl and add lemon juice a little bit at a time while whisking together with a fork until thin "syrupy". Drizzle over warm scones and immediately sprinkle a few toasted, sliced almonds over each one if you like. If freezing the scones, leave the icing step until ready to serve.

Notes: In addition to not having the buttermilk, limes and blueberries for the original recipe, I also didn't really have the cornmeal. What I had was the course-ground kind for making polenta with. I measured it out and whirred it around in the food processor for 20-30 seconds. Probably could have used even more time, but it seemed to work o.k These scones are supposed to have a little crunch, right? I also used the food processor to cut in the butter (note to self: 1/3 cup is not the same as 1/3 of a stick). Instead of making drop scones, I patted the dough flat and cut out circles using an empty tomato paste can as a biscuit cutter. Ended up with 17 small scones.

Sunday, November 15, 2009

Pear Crostata

Experimented on my friends again today. I don't really see them as guinea pigs, and I certainly hope they don't feel that way. Often though, I try recipes for the first time when asked to bring something for a pot-luck. It's that "sink or swim" method that I, for some weird reason, seem to enjoy. "I sure hope this works, because if it doesn't, there's no time to make something else".

Sheesh. Maybe I don't have enough stress in my life. Although, if you really think about the term "pot-luck", maybe I shouldn't feel bad: Pot = dish of food and Luck = element of chance. I'm simply contributing to an ancient and cherished cultural tradition. Think about it, if I only brought dishes that were a "sure thing"... how then is the "luck" aspect to be represented?

Today I made a Pear Crostata based on my favorite Peach/Plum Crostata* recipe. Not exactly flying blind, I'll admit, but still I had no idea how the pears would act, or what proportions of stuff to mix with them, etc.

My tendency is to lean on a recipe like a person with a broken leg leans on crutches. I need it to support me and take some pressure off, but eventually find that there are times when I can set it aside and hop around on one foot. So this is me, doing my part to preserve our rich history... without crutches.

Pear Crostata
[[Original pastry recipe is no longer available. New recipe has been linked below]]

1/2 recipe of Prodigal Pastry
zest and juice of one lemon
1/8 cup flour
1/8 cup sugar
1/4 tsp cinnamon
1/4 tsp cardamom
5 large pears (or the equivalent)
1 small handful of cranberries

Prepare the pastry according to the recipe. Roll out to a 14" circle (don't worry if it's not perfectly round). Put pastry back into fridge, either on a baking sheet or loosely rolled between two pieces of plastic wrap.

Pre-heat oven to 400°. In a large bowl, mix together the lemon, flour, sugar and spices. Peel and core the pears, then cut them into 1/4" slices (or 1/2" cubes). Work with one pear at a time, dropping the slices into the mixture in the large bowl and stirring them gently every so often. Chop the cranberries (not too fine), and set aside.

Take the rolled out pastry from the fridge, and if not already on a baking sheet, center it on one now. Using your hands or a slotted spoon, transfer the fruit from the bowl to the pastry surface. Do not dump the fruit from the bowl onto the pastry! Spread/arrange the fruit evenly over the pastry, leaving a 2" border around the edge. Discard any extra liquid on the bottom of the bowl. Scatter the chopped cranberry evenly over the pears.

Fold edges of pastry inward, and lightly press the folds that form as you go around. Brush the folded edge with a little water and sprinkle with sugar. If it's warm in the kitchen, or if (like me) it takes longer than you thought it would to arrange the fruit and play with the edges, pop the whole thing (pan and all) back into the fridge for 15 minutes.

Bake at 400° for 15 minutes, then drop oven temp to 375° and bake for another 25, or until crust is nice and golden/amber colored. Let rest on pan for 5-10 minutes, then carefully slide onto a rack to finish cooling. After that, I usually slide it onto a big cutting board and cut it into wedges with a pizza-cutter.

Notes: Overall, it turned out well. My biggest complaint was that I should have made two of them. Always make more than you think you'll need. It was a little heavy on the cardamom (corrected amount is listed). The pear slices did not hold up during the careful stirring part. Next time I'll dice them instead. Try increasing the amount of cranberries and tossing them with the pears. Try ginger instead of the cardamom. Still not a fan of baking with pears. If they're firm enough to work with, they're unripe; if they're ripe, they'll fall apart and not hold their shape. They sure do taste lovely though.

*I'm noticing that all the crostati I've made use fruit that begins with the letter-"P". I was planning on trying apple next, but maybe I should use papaya or persimmon instead? Or would Pippins be o.k.?

Thursday, November 12, 2009

Hors d'Oeurves, Appetizers and Such

I was just reminiscing about this super tasty appetizer we had at J winery in Dry Creek Valley during the Food & Wine Affair. I think it may have been November of 2007? Well, I may have forgotten the date, but not the amazing hor d'oeurves they paired with one of their wonderful champagnes. Which one? Yeah, I don't remember that either.

It shouldn't be too hard to recreate that appetizer though. As I recall, it was simply: a leaf of endive* with a blob of creamy blue cheese, a chunk of fresh fig, and a candied pecan half on top... Perfection, especially paired with champagne!

In honor of the upcoming holiday party season, here is a selection of other tasty nibbles and garnishes to make and enjoy...
*I never know whether to say en-dive or ahn-deev. Oh well.

Monday, November 9, 2009

Meatballs/Meatloaf

A Meatball Time Line:
  • Newly-married... spaghetti is a big part of our diet. Attempted the meatballs from Betty Crocker Good 'n Easy Cookbook. Unremarkable. I don't bother making them again.
  • Trader Joe's opened nearby and we opted to buy their frozen turkey meatballs.
  • My job got outsourced... shifted over to the fresh meatballs at CostCo. More meatballs for less money (and they were tasty too).
  • CostCo stops carrying the tasty meatballs... we start buying the frozen CostCo meatballs.
  • Had to tighten our belts even more*. We return to the arena of the homemade meatball and attempt to identify the secret ingredient in the CostCo meatballs that we loved**. We think caraway seed is it. Made a big batch of meatballs (>4 doz.) to freeze. We were wrong about the caraway seed. Meatballs were not horrible, but not great either.
  • Research herbs, spices and meatballs online... now believe secret ingredient to be: fennel seed. Still had a couple dozen "meatblahs" to wade through before we could try it out.
  • Time passes...
...And here we are today: We have bought the fennel seed, hit up CostCo for what seemed like a truckload of ground meats, and are ready for our next attempt. So, while my man is out front chopping wood, I am making thousands of meatballs. By evening we will be all set for the coming winter. My soundtrack? The smooth, cool, mellow and haunting double discs of Billie Holiday - Lady In Autumn: Best Of The Verve Years. I am in no hurry. I am a meatball making machine. I am in the zone.

The Meatballs:
Used these two recipes for inspiration/cook times/etc...
Totally Tender Meatballs in Tomato Sauce from TheKitchn
Caraway Pork Meatballs with Tzatziki
at EatingOutLoud

3 lbs ground beef
3 lbs ground sausage (I used Jimmy Dean)
4 eggs
8 slices sandwich bread, torn into small pieces
1.5 yellow onions (CostCo sized), minced
3 cloves garlic, minced
2 Tbsp dried Rosemary
1 Tbsp Fennel Seed
1 tsp Caraway Seed
1 Tbsp sea salt
1 Tbsp Italian seasoning
1 Tbsp dried parsley
2 tsp ground black pepper

Mushed it all together with my hands. Used small cookie scoop to plop semi-uniform amounts of mixture onto foil lined baking sheets (24 per sheet). Rolled each mound into balls. Baked two sheets at a time for 20 minutes at 375°, swapping tray positions after 10 minutes. Let cool in pan. Roll meatballs off of their little fat puddles. Freeze on pan for 20 minutes, then drop into a large freezer bag and store in freezer. Made 4 pans of 24 meatballs (96 total), plus there was enough meat mixture left for....

The Meatloaf:
Referred to the following recipe for reassurance, time, and temp:
Basic Meatloaf, Page 495, How To Cook Everything, 1998

Added a can of corn (drained) to the excess meat and mixed it in. Formed two smallish meatloaves in loaf pans. Made a trough down the length of each and filled with ketchup, like Mom used to. Baked at 350° for 45 minutes (or to 160° on instant-read thermometer), rotating pans halfway through. They shrunk considerably. Poured off fat and juices from both, sliced and served one, froze the other.

Notes: A little too much onion; mince smaller and only use one CostCo-sized onion. Could stand more garlic, fennel, and pepper. Try fresh rosemary next time (hopefully I'll have some growing in the yard when the time comes to make more. [hint hint]). Surgical gloves would have made this go much easier. Not because of any squeamishness over touching raw meat either (I'm pretty much over that). But, once both hands are in it, you're kind of stuck if there's nobody around to help you answer the phone, turn on the tap, or touch... anything. In lieu of gloves, maybe I could put plastic baggies over the faucet handles. That would at least make it easier to wash my hands when I need to.

*This is only an expression having to do with watching our spending. We did not lose weight.
**The tasty meatballs came in a clear plastic two-bag pack surrounded by a cardboard sleeve. We separated the packs and stored them in the freezer, so the outer packaging was long since recycled. It probably just listed it as "Spices" anyway. That always bugs me. Which spices? Why don't they want you to know?

Thursday, November 5, 2009

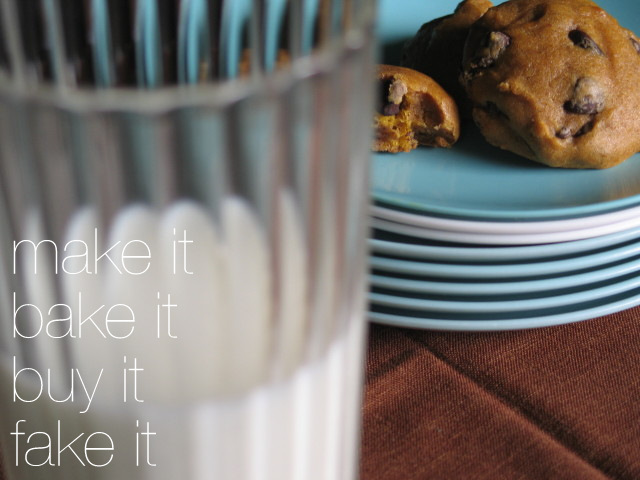
Pumpkin Chip Cookies

Pumpkin Chip Cookies
A drizzly gray November day means only one thing: perfect baking weather! I had wanted to make these cookies last week, but assumed that the recipe called for butter, which we were out of. How surprised was I to discover that there's no butter in these cookies? While I do love a crisp buttery cookie, it's nice to know that there are options out there. You know, for those times when your inner-cookie monster comes out and starts getting all demanding on you. These are soft, cakey cookies that are super easy to make and should appease most monsters. They would be a great addition to a Hallowe'en party dessert spread. And while it's a little late for that this year, it is still pumpkin season, so no excuses.

Tuesday, November 3, 2009

Time-less Cherry Cheesecake

When you need a simple and elegant solution for a potluck or even for your own dinner party but don't have enough time. Gather the following items:
  • 1 Frozen Cheesecake (pre-sliced if possible)
  • 1 can Cherry Pie Filling (the goopy kind)
  • Pretty cake plate
  • Pretty pie server
  • Pretty crystal or ceramic bowl
  • Pretty serving spoon
Yes, I repeatedly specified "pretty" serving pieces. That's an important part of this fake. Store-bought foods always always always look better when taken out of their original packaging. By putting the cheesecake on a pedestal with the cherries in a cut glass bowl next to it, it becomes something that is more than the sum of its store-bought parts.

Do this when you know ahead of time that you'll need a dessert but that you won't have the time to spend in the kitchen preparing one. It's best to buy the cheesecake the day before, so it can thaw overnight in the fridge (it's kind of hard to pull off a successful fake when the cheesecake is still frozen in the center).

This really isn't a cost-cutting idea (decent quality cherry pie filling is no bargain), or even a last minute bail-out (due to the frozen-ness), it is primarily a time-saving device. Will everyone know that it's a fake? Certainly. But just like canned white peaches in champagne, they'll all be too busy enjoying it to care!

Friday, October 30, 2009

Ghostess With The Mostess

Spooky & Cute: Little Ghost Meringue Cookies
When I was younger, my Mom used to make meringue cookies. It seemed like she made them for every occasion. She made plain ones, pastel-tinted ones, and even mint chocolate chip ones. I think she must've loved making them as much as I loved eating them. As a youngster, I tried making them by myself and they turned out gooey and chewy. We still ate them. But they didn't have that airy crispness that made hers so wonderful. I always meant to try them again, but with so many other cookies out there that weren't finicky, they never were attempted a second time.

As fate would have it, the other day we found ourselves wanting cookies (needing, really) and there was not a lick of butter in the house. (Everyone knows that the "b" in baking stands for butter). We were dejected for sure. But inspiration struck and I said "Honey, there IS a cookie that doesn't call for butter: meringue cookies! Hot diggety!" And so I planned to make some. But before I did, I realized that it's Hallowe'en and I remembered seeing those same meringue cookies made up like little ghosties with chocolate eyes. How perfect was that?

Light and ephemeral, just like "real" ghosts, there are hardly any ingredients at all to speak of. Had we not run out of butter just before Hallowe'en, who knows if I ever would have attempted meringue cookies again. Funny how those things happen, huh? You might say, it's almost... spooky even. Mummy will be so proud...
Notes: Used the recipe from 101 Cookbooks. It intrigued me with it's use of powdered sugar. I doubled it before thinking about oven space, cookie height, and rack clearance. Kitchen was cold and the egg whites were still chilly after being out of the fridge almost an hour. Took over half an hour for stiff peaks to form. Decided that it had to be ready, as it just wasn't changing anymore. Added a quarter teaspoon of vanilla in the very last minute of whisking and went for it...

Filled up a disposable pastry bag (without a tip) with the mixture and started piping mini-ghosts. Refilled it for the second tray-ful and continued. Put both trays in the oven and continued to follow recipe. It looked like the cookies on the second tray had started to shlump after 10 minutes in oven, or maybe I just made them squatter because I was afraid there wasn't enough clearance under the top rack? Make sure to leave them in the oven for as long as the recipe states... or even longer. They must dry out completely or they will be chewy on the inside.

Sunday, October 25, 2009

Kicking the Can (of beans)

We always stock up on cans of black beans when we find a really good sale on them. They're great for adding to quesadillas and burritos, and they're super healthy too. We learned some things the hard way though. The sale/store brand beans had ingredients other than just beans and water (and I don't mean spices). They're canned right? What else do you need in there?

What really got our goat was that after draining the "liquid" from the can, we were left with half a can or less of actual beans. By comparison, the regular/name brand cans of beans had less "ingredients" and more beans. Sometimes, every so often, you do get more when you pay more. More of the good and/or less of the bad. Of course, good healthy food does seem to cost more on the whole than the unhealthy junk. So that really shouldn't surprise me. But... beans?

Well, we finally finished off the last of those bargain beans the other day and it hit me that instead of buying more cans, I could just buy dried beans and cook them myself. And in the interest of our utility bill, I found that I could cook them in the crock pot for even less. Thanks to the instructions linked-to below, I have pre-measured baggies of cooked black beans in our freezer, and more space in our pantry. Not to mention more coin in our pocket... and that's always a good thing.

Cooking Dried Beans In The Slow Cooker from the Crockpot365 blog

Thursday, October 22, 2009

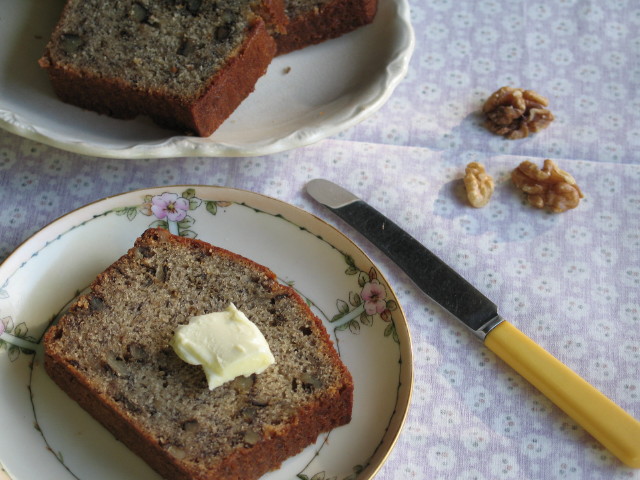
Banana Bread (Basic)

There were more frozen bananas in our freezer than you could shake a stick at.* Probably enough for four loaves of banana bread. At least. That's kind of a lot. So I thawed 6 of them, got out my favorite recipe and then realized that I don't have any whole wheat flour. I don't even have any white whole wheat flour.

Back to the books in search of a basic, but potentially yummy banana bread recipe. I found one that looked promising; the most exotic ingredient was sour cream. This also turned out to be the perfect opportunity to try out the "Beater Blade Plus" that I got as a birthday gift.**  After a couple little adjustments, it was running smooth. Yee Haw! I could just kiss the person who invented this thing!

Seriously, but I digress... It's like banana bread central around here sometimes. The funny thing is, I never really made it before this last year. For the life of me, I don't know why... it's cheap, tasty, filling, sort of healthy, freezes well and tastes great even without butter (not many foods can boast that).
 
Page 106, The Martha Stewart Cookbook: Collected Recipes For Everyday, 1995
Notes: Doubled the recipe. Didn't measure the bananas. Recipe called for 1 cup mashed (doubled would be 2 cups). Most recipes say 3 bananas, so I doubled it and used six (and crossed my fingers once I realized what I'd done). Greased pans with butter wrappers. Tester was not clean at 1 hour. Rotated pans and baked for 10 more minutes... still not clean. Another ten minutes did the trick. One hour and 20 minutes total. Rested on sides on rack for 10 minutes then attempted to turn out. The first loaf released perfectly, the second... we'll just say less than perfect. Should have let it rest a bit longer probably and not insisted when it resisted. But broken or not, it tastes great!

*I'd love to know the origin of that phrase. Tried to look it up online but its etymology is apparently unknown. Lots of definitions, lots of guesses, no definite origins. Regardless of where the term came from, I have six less bananas in my freezer and can now shake a stick at the remainder as much as I want. Still don't know just why I'd want to though.

**I'm not a woman who has issues with receiving cooking implements from my husband on gift-giving occasions. Other household accoutrements are a whole different story. We would have to have a "discussion" if I found a pretty bow tied to a dust-buster or some such item. Cool tools for the kitchen though? Bring it on. Just maybe not on Valentine's Day.

Wednesday, October 21, 2009

Ham Hock Bean Soup aka Navy Bean Soup

Went chasing after a memory today. Recent coversations about moms, comfort food and cold weather got me thinking about my mom's navy bean soup. While she's looking through her bazillion cookbooks for the recipe she used, I decided to forge ahead and see what I could come up with. What I found was Ham Hock Bean Soup. It had all the required elements, and it seemed a lot like the one I remember. Not that I've ever made it. Mom made it, we ate it and loved it.

This would be the first soup I've ever made from scratch. How bizarre is that? There are so many things like that, basic things, that I've never cooked before. I feel like such a newbie in the kitchen sometimes. But now I can say that I've made soup! The Hubs thought it seemed like a really involved and complicated recipe. Maybe it is. Maybe it isn't. I don't know... never made soup before! There were lots of different stages to this soup, to be sure, but it was pretty straightforward. And it was pretty delicious too. There were no complaints when all was said and done. The house smelled fabulous all afternoon, and we both had seconds. I'm sure there are shortcuts, but I don't want to know about them.*

We all grew up hearing that "soup is good food". And it really is. But not from a can. Or a jar. Soup from scratch takes time, and it's main ingredient is love. Cheesy... yeah, bear with me though, because it's true. If it wasn't, I'd just grab a can opener and be done with it. Most soups are made from a few simple, even humble, ingredients (it almost doesn't get much humbler than a ham hock, not in my kitchen anyway), most of which are already in the pantry. That leaves: time. And to spend that much time preparing food means putting love into it. You must love the process or the people who will be nourished by it. Or both.
 
Ham Hock Bean Soup, page 61, Sunset: Homemade Soups, 1986**  
(similar recipe here from Cooking Light: Hearty Navy Bean Soup )
Notes: The day before starting the soup, I soaked the beans for 6 hours, then drained, rinsed, and drained again. Stored them in the fridge until I was ready to use them. Used homemade chicken stock that my sister made during one of her visits (I won't say how very long ago that was, let's just say it wasn't made in this kitchen), dried beans from the bulk bin at the store, and my own dried rosemary (from that same other residence). Tried to chop the dried rosemary into smaller pieces and it flew around like a cloud of confetti! Don't chop... just crumble into the pot! Used a stick blender directly in the pot instead of trying to pour half into a blender like the recipe suggests. I may not use it often, but that stick blender has more than earned the real estate it takes up in my kitchen cupboard.

The recipe made 6 servings. I divided up what we didn't eat; two servings in the fridge and two in the freezer. I do wish it had made more, for all the work that went into it. But now that I've done it, it won't seem like so much effort the next time.
Realized the next day that I forgot to add the salt and pepper at the end. It didn't need it! While the pepper might add a nice extra note, the ham hocks were plenty salty and neither of us noticed any absence of flavor.

*Do you know that the only packaging that I had to open, was the plastic wrap over the foam tray from the ham hocks? If I'd purchased them from a proper butcher counter, they probably would've been wrapped up in paper instead. When all was said and done, the only things I had to throw in the trash were to do with the ham hocks: the aforementioned packaging, the bones, skin, and fat. Since I'm going to make this again and am not willing to forgo the ham hocks... I'd better find an "old school" butcher counter! As for the rest: the produce bags get reused, and the veg scraps went into a bag I keep in the freezer for future vegetable stock.

**Now I know this isn't mom's recipe because of the publishing date. It tasted a whole lot like her soup though, and sensory memories like that don't lie.

Sunday, October 18, 2009

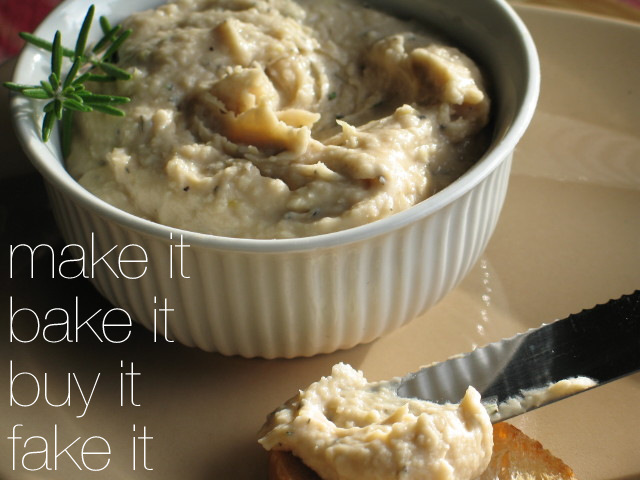
Simply Smashing White Bean Dip

Simply Smashing White Bean Dip
Made this dip for a party we went to today. It's hard to say whether it was a success or not. Some of it was eaten, certainly, but there was plenty left to take home. Of course, there was a ton of food at this get-together. So much that whole sub-sections of party food neglected to make it onto my plate. Assuming that other people had a similar experience, I should take it as a positive sign that a few people did indeed try my dip. There was no real feedback other than when I turned around and saw Hubs dipping pieces of bread into the bowl of dip... before we'd left for the party. Uh, yes. He did.

I thought that this dip would be a perfect choice, given that the ingredients were few, and the technique simple (even considering that it involved the use of the food processor), and in addition, it sounded really tasty.

All we needed at the store were beans and lemons. There wasn't time to cook the beans from scratch, so we bought a can of navy beans and a can of cannellinis. We also picked up some coffee and steel cut oats while we were there. "Hey, we should get some dried beans to cook up for soup this week. We'll need carrots and celery for that"...

Can you believe I forgot the lemons?* Don't answer that. Hubs graciously went back to the store while I started making the dip. He came back with eyes wide open. He'd never purchased lemons in a grocery store evidently. Why would you, when you know lots of people with lemon trees? Of course, when you move away, even a few miles, all of that is moot. The supermarket is closer than your old friends.

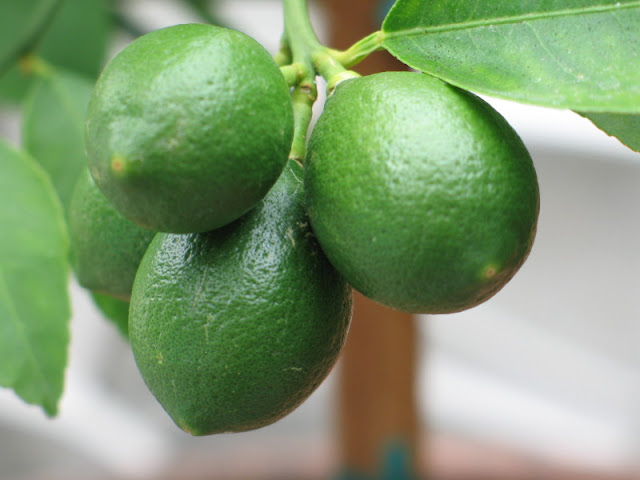
What did you say? Why yes, we do have a lemon tree! Funny you mentioned it. The lemons on it don't seem to be getting any bigger or yellower though. They've been green so long that twice now I've accidentally referred to it as "the lime tree" and Hubs had to correct me.

Well, he came home with those pricey store-bought lemons and went straight past me to the back yard, where he proceeded to show them to our little tree while yelling, "GROW FASTER!" at it. Really loudly.

Simply Smashing White Bean Dip
Adapted from: Rosemary-Lemon White Bean Dip by Mark Bittman

2 - 15 oz. cans of white beans (3 cups)
2 cloves of garlic, peeled
3/4 cup olive oil, plus 1 Tblsp
1 "three-finger" pinch of salt, plus more to taste
3-4 grinds of black pepper
2 lemons, zested
1 good squeeze of lemon juice
1 Tblsp fresh rosemary, finely minced

Drain the two cans of beans and put them into the bowl of a food processor along with the garlic and salt. While the machine is running, drizzle the olive oil into it and continue processing until smooth. Taste the dip at this point, add the black pepper and any additional salt if needed. Pulse a couple of times to distribute the seasonings evenly. Using a rubber spatula, scrape the dip into a bowl and mix in the lemon zest, juice, rosemary and a tablespoon or so of olive oil. Garnish the bowl with a leftover sprig of rosemary and serve with raw veggies or little toasts (see notes).

Notes: Each 15 oz. can contained 1-1/2 cups of beans, drained. Since the original recipe called for 2 cups, and I had 3, I decided to make half a recipe more and use up all the beans. I kept all the other quantities pretty much the same except for the olive oil which I increased roughly by half. The Hubs sliced up a baguette I had bought at the farmer's market yesterday, brushed the slices lightly with oil and popped them under the broiler for a few (watching the whole time and flipping them over once the first side started to get color).

*We were there for two items and I forgot one. Proof that my memory/retention is holding strong at 50%. Note to self: WRITE IT DOWN!... AND BRING THE LIST WITH YOU!

Saturday, October 17, 2009

Beans, Beans...

My sister taught me a charming little poem when we were children*, which I will not repeat (oops, pun!) Unfortunately, it's been stuck in my head as I collected the following recipes. I apologize profusely. Terribly embarrassed and all that. If you don't know the poem, ask a little kid (or a big kid). You won't read it here. I am grown up now and am above that type of humor. Really. Where was I... Oh yes...

Beans are really good for you in lots of ways, and if you cook them up into something delicious, it's a win-win situation all around. And they're inexpensive too (win-win-win). Here are some raved about recipes and techniques to try...
*Mom doesn't think that I need to use the past tense there.

Tuesday, October 13, 2009

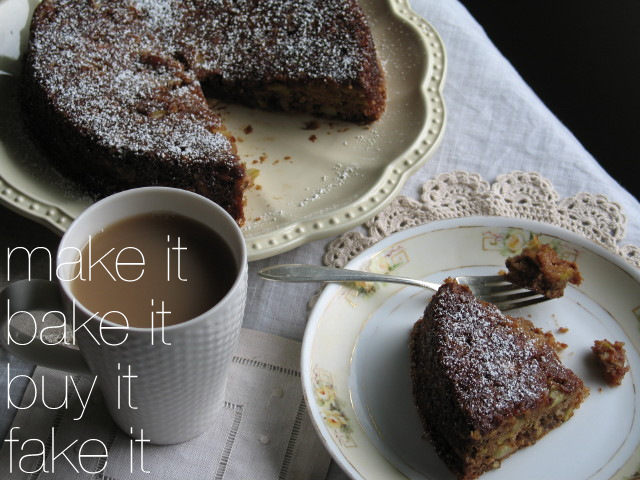
One-Bowl Apple Cake

Easy & Delicious One-Bowl Apple Cake
The last of the sad apples have been reincarnated as this easy apple cake. They must've done something right during their little apple lives to have ended up here. The warm cinnamon and apple smells coming from the oven are just so good. Maybe they're not exactly reincarnated, but with so many other obvious metaphors to choose from, this one was as good as any. A few weeks ago these little apples had fallen off of a tree. That's pretty much the end of the road for an apple. These particular windfalls found their way into my kitchen and there they sat. And sat...and sat. Until today. I washed and dried them, cut them up and baked them into this cake (o.k. cakes - I made two), now cooling on my counter top. Those little apples are now fully realized as our breakfast. They're happier now. Tender, moist, nutty and fragrant. It's a good thing I made two.

Thursday, October 8, 2009

Baked Apples a la Betty

A few sad apples were pleading with me from the drawer in the fridge. They felt forgotten, and so they had been. Since there wasn't quite enough leftover oatmeal from yesterday to feed both of us today, I had the lovely idea to augment the porridge with baked apples. Oh yum and yes, please!

Then the realization hit me... Crank up the oven to 350° for a whole hour, just to cook 4 apples for breakfast? Holy gas & electric bill, Batman! Not gonna happen.

Betty Crocker to the rescue! The New Good And Easy Cookbook (circa 1962) to be precise.

Yes, the home of such delectable dishes as: Asparagus-Dried Beef Savory, Feast-A-Pie, and Pacific Lime Mold*, also provided the time and money-saving fake for our breakfast this morning. 

Baked apples on the stove top.  Who knew?  Betty did, that's who.

Magic Apples 
(page 47, Betty Crocker's New Good And Easy Cookbook, 1962)

These are the basic steps...
  1. Prepare apples according to your favorite baked apple recipe. I core them from the bottom with my trusty melon-baller and stuff them with whatever chopped nuts and dried fruits are on hand, along with brown sugar, cinnamon, and some butter. 
  2. Place apples in saucepan with 1/2 inch of water and put the lid on it. 
  3. Cook on medium heat for 10—12 minutes or until tender, removing lid for last couple of minutes.
Notes: Not quite as good as traditional baked apples but way faster and a whole lot easier on the electric bill!

*All delectable dishes listed are actual recipes found in the above-mentioned cookbook and were chosen randomly, however the weirdest ones were given preference. And let me tell you, it was hard to limit the list to just three!

Wednesday, October 7, 2009

Overnight Irish Porridge

E-Z Overnight Irish Porridge
Every kid knows that The Three Bears ate porridge. But did you know that when we eat oatmeal for breakfast we're eating porridge too? Porridge is made from cooking cut, crushed, or rolled grains in water or milk until soft and creamy. And totally comforting. Why we refer to the ingredient and the finished preparation as the same thing, I just don't know. If I laid awake at night thinking about it (yep, did that), I would want a hot bowl of porridge the next morning to make me feel better. For my money though, I would want that porridge to be made from steel cut oats.

When I was a kid, my oatmeal generally came from a little packet that was mixed in a bowl with hot water. Healthy, maybe. But kind of lacking in the texture and flavor department. Goldilocks would have pronounced it to be "too boring!" (in that petulant little way that she has).

Sunday, October 4, 2009

Vegan Chocolate Slime Cake

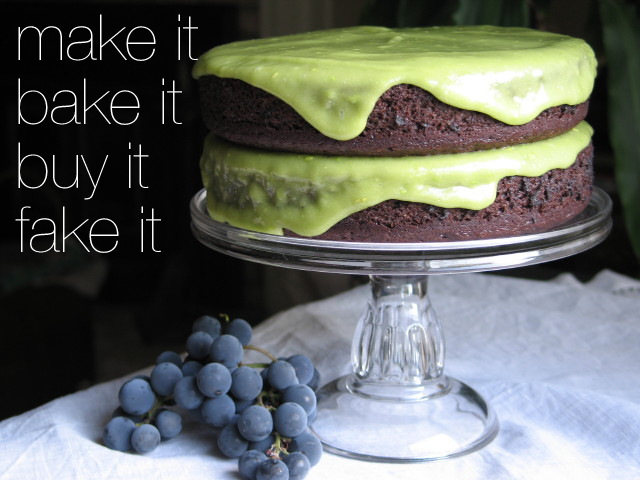
Vegan Chocolate "Slime" Cake
So maybe that's not the best name for this, but it's the one I like best. The real name is below in the link. But I made this as a Halloween cake and frankly the frosting reminded us of the movie Ghostbusters. More specifically, it reminded us of the ectoplasm or slime that covered Dr. Peter Venkman after his first encounter with the gluttonous hotel ghost (appropriately nicknamed "Slimer").

Perhaps this is not the best cake to take to a potluck, but with various people's allergies and other nutritional restrictions to consider... I thought I'd try it. Besides, it looked like a lot of fun and all I had to buy were avocados which we picked up at a little roadside stand on the way home. My favorite recipes are always the ones I don't have to go shopping for.

We later decorated the top with little rubber bats, rats and black cats, hoping to ensure the interest of the kids present... unnecessary really, with that bright green frosting! I won't repeat what the Hubs told them it was made from, but it was ironic that while they thought it was (insert name of gross stuff here), they ate it without a problem; once the mystery ingredient was revealed to be avocado*, they scraped it off. Kids! As far as I noticed, none of the adults scraped it off, and some even had seconds.

Thursday, October 1, 2009

October = Pumpkins

With each change of season I think to myself, "This is the season I love best!". If I were forced to pick a favorite though, it would be autumn, hands down. There are no extremes in the autumn. The days are warm, dry and clear, and the evenings are cool. You can wear your favorite suede shoes all you want. You no longer need to try and keep the house cool, but it's not quite time to worry about heating it either. Hot drinks start to replace iced ones, and you don't mind a bit.

October in particular is synonymous with so many wonderful things: bringing sweaters out of storage, the leaves turning colors, noticeably shorter days, Hallowe'en candy, and the gorgeous golden light coming from the sun.

But best of all, it's time to start adding the earthy flavors of fall into our cooking. Starting with pumpkin. Here are a bunch of pumpkin recipes and ideas to get us all in the mood...

Thursday, September 24, 2009

Cipollini and Mushroom Tart

The first time I ever had cipollini onions was the year we did a whole Martha Stewart Living Thanksgiving dinner. I was in charge of some of the side dishes and so became introduced to the lovely little cipollini. Normally, I'm not one to wax poetic about onions. They have their place but they're not a star on their own. These were. Pardon the pun, but they were gobbled up. Every last one of them.

This is not that recipe.

When I find it again, I'll definitely add it here. In the meantime, this dish sounded really really good. It's autumn after all, and my thoughts are turning to onions and mushrooms and other earthy delights...
Updated this to include links to these Martha Stewart onion recipes...
These all sound great and would no doubt taste good too. If the recipe I made was one of these, it was probably the Pan-Roasted Balsamic recipe. Don't quote me on that though. I can't be sure until I make it again!

Sunday, September 20, 2009

Roasted Veg & Creamy Polenta

Notes: Made this for a potluck. Twelve people. Tripled the polenta, ended up with a little left over. Used real butter and real cream cheese. The polenta was kind of firm, not so creamy. Maybe too high of heat? Too long of cooking time? Checked other recipes after and they all call for more liquid. That's got to be it. Tasted good though. Def needed the salt to give it any flavor. Next time stir in some Parmesan or other cheese. 

The veg shrunk down quite a bit, but had plenty. Some took longer to cook than others so I made up one pan for the fast cookers and one pan for the slow. Bell peppers took the longest to cook (and were the most expensive! who knew?). Zucchini cooked the fastest. Don't cut the zucchini so thin next time. If they're small, cut in to spears instead of slices. Try sprinkling on a little balsamic at the end for more flavor.

Vegetables I used:

  • 5 sm zucchini (cut into lengthwise strips)
  • 5 slender carrots (cut in half, length and width-wise)
  • 2 sm red onions (cut into eighths)
  • 2 lg red bell peppers (cut into large strips)
  • 2 pkg mushrooms (left whole)
  • green beans (ends trimmed)

Wednesday, September 16, 2009

Sourdough (Blueberry) Pancakes

Sourdough Pancakes with Blueberries, page 54, Williams-Sonoma Kitchen Library: Breakfasts & Brunches, 1997

Notes: I didn't have any blueberries, and while the recipe does say that you can use bananas, mine are so ripe that they're good only for banana bread (actually they're great for that!). There was a small bag of strawberries in the freezer though, so I thawed them out and used them instead. The recipe says it makes 12 pancakes, I got 10. Close enough. They don't taste as sourdough-y as the other ones I've made recently, and
they cooked up more like regular pancakes as well. These probably don't use as much starter. I can't see going to the extra trouble of making these when they are so much like "regular" pancakes. Will try them again though for confirmation.

Tuesday, September 15, 2009

Whole-Citrus Vinaigrette

Don't be fooled by the color, these are lemons...The flavors in this salad dressing recipe bring to my mind the words "sunshine" and "summer". Not exactly sure why. Citrus fruits are actually a winter crop, and their bright bursting flavors are the perfect foil for all those hearty winter foods that we tend to prefer during the cold months.

But what about spring and autumn? Citrus flavors are complimentary to the foods we eat at those times also. Indeed, citrus flavors seem to be at home in any season. Perhaps growing up in the southwest (longer growing season, virtually no winter) is what makes me think of citrus as season-less. Now that I live farther north, I am more aware of the seasonality of things (and the cost of buying things out of season). Thankfully, I'm a quick learner and don't require annual snowfall in order to gain this valuable awareness.

As you can imagine, I was delighted to learn that Meyer lemons bear fruit year round. I'd never even heard of a Meyer lemon before I moved here. A lemon was a lemon. A Eureka lemon to be exact. Well, my little dwarf Meyer lemon tree on the patio now has a dozen or so golf ball sized green fruits on it and is still pumping out flowers. The blossoms smell insanely sweet and my mind reels at the thought of thousands of full grown potted citrus trees inside the Orangerie at Versailles* circa 18th century France. It must've been intoxicating. Yep, it's good to be the king (at least until the peasants find out what you've been up too).

Just reading this very simple salad dressing recipe from the Napa Style website made my mouth water. Add some grilled chicken to either of these salads and call it dinner (whatever the season).
*Read more about the history of orangeries. Check out this flickr slideshow for views inside the Versailles Orangerie, then go to this web page for some great photos of the Parterre Sud (south garden in front of the Orangerie) where the trees live during the more temperate times of the year. Lucky trees. I do wonder how they managed before the forklift was invented though. Oh, and just in case you were curious... what the heck is a parterre?