Wednesday, December 2, 2020

Saying Yes! to December (and Norwegian Waffles)


Haven’t been around here much lately. This %#&@! year was letting me know it wasn’t going to go quietly away. September was transitional, like that carton of milk you have to ask your housemate to smell because something about it doesn't seem quite right. October was particularly awful – all tricks and no treats. November got an extra emphasis on its first syllable and shouted “NO!” a lot… or maybe that was me?

But here we are now in December already! Will things continue as they have been or turn around and change their tune? It's too soon to tell. The month is still young even if the year isn’t. I'm going to do my best to be positive. I dearly want this month to say “Yes!” a lot. Heck, I'd be probably be happy with a "maybe" here and there. Yes! I would.

In order to kick things off on a positive note, I made some waffles last weekend. Not just any waffles, Norwegian Waffles. But since I’m all about the Yes! this month, I’m calling them Yes-wegian waffles (Yes! I know it’s silly... Yes! I don't care).

I’ve never gotten the knack of Norwegian Pancakes and have long since stopped attempting them. But Norwegian Waffles? Yes! Yes, I can (and so can you)! They are easy-peasy and are especially festive and appropriate this time of year as they are delicately scented with cardamom and Christmastime. Two of my favorite things.

My hubby, though half-Norwegian, preferred them with butter and maple syrup* while I really enjoyed eating them the Norwegian way: with a smear of sour cream (or plain Greek yogurt) and a dab of berry preserves. Ultimately though, they're waffles... what's not to like, right? I'm making them again today. Yes, I really am!

So, with thanks and apologies to Arne & Carlos, whose recipe I fiddled with, here is the "how-to" in case you want to try them...


Norwegian Waffles
(aka: Yes-wegian Waffles)
…adapted from the Arne & Carlos: Norwegian Waffles podcast

1-2/3 cups flour
1/3 cup sugar
1 Tbsp cardamom
1 tsp baking powder
1 good pinch of fine sea salt
1-2/3 cups half-n-half  
1/2 cup (1 stick) unsalted butter, melted and cooled slightly
5 large eggs, lightly beaten
1 tsp vanilla extract
  1. Whisk dry ingredients together.
  2. Add wet ingredients, mixing well after each addition.
  3. Let batter sit for 30 minutes.
  4. A few minutes before the time is up, begin preheating your waffle maker.
  5. Ladle enough batter into your preheated waffle maker to make one waffle. Amount will vary depending on your maker.
  6. Repeat until all batter is used.
Notes: The original recipe made twelve waffles. My waffle maker yielded eight with this recipe. Your results will undoubtedly vary. Any uneaten waffles can be reheated the next day or frozen for next weekend! Or... use leftovers to make ice cream sandwiches! Yes, please!

Optimistically Yours,

Steph


* I love maple syrup, but it has such a strong presence that the lovely (and pricey!) cardamom just gets lost.

PS... this blog post was brought to you by the punctuation mark that I try not to over-use, but is just so loaded with potential positivity I couldn't help myself!

Tuesday, September 8, 2020

An Ice Cream Conundrum (Triple Mint Chip Ice Cream)

Real Mint Ice Cream isn't Green!
Nearly every recipe for home made ice cream I've made says something along the lines of, "eat within 3 days" or "keep for up to a week in the freezer". Why three days? Why a week? Well, I have personally done some highly non-scientific home-testing on this subject and am here to tell you: Ice cream you make from scratch will keep just fine for longer than a week. It will last even up to four weeks! None of the test subjects lasted longer than four weeks because that happens to also be the absolute and total limit of our self-control... or I might have just forgotten it was in the freezer. Oops.

The only reasoning I could find anywhere for the 3-day/one-week rule was that the ice cream could start to lose it's flavor the longer it sat in the freezer. It may happen to some extent, but it doesn't go from luscious to unpalatable after that one-week mark. I, for one, haven't discerned any noticeable deficiency of flavor in the ice creams I've made, nor did any of them pick up any off-odors during their one to four weeks in the icebox. That said, the chocolate chips, nuts, and other mix-ins will suffer texturally if frozen too long, but the ice cream itself will be fine.
 
So go ahead and make the homemade ice cream more than a week ahead of when you need/want it, just save the textured tidbits for sprinkling on top when you serve it... and don't forget that it's in the freezer! Wondering what kind of iced cream to make? Here's a good one if you really like mint—or are ambivalent about it but happen to have a ton of it taking over your yard...
 
Triple-Mint Chocolate Chip Ice Cream 
Start with a good, natural (actual mint leaves), Mint Chip Ice Cream recipe. I love this fantastic recipe from David Lebovitz. Then, instead of using just one type of mint, substitute a combination of three different varieties. The three that are growing in my back yard are: Peppermint, Chocolate Mint (a variant of peppermint), and Spearmint. I've found that a 2/3 to 1/3 mix of peppermints to spearmints made a nice balance, but play around with it. Don't sweat it if you can only find two varieties. Just call it "Double-Mint"! Side Note: If you're not going to eat it right away, for heaven's sake don't use the cheap mini chocolate chips like I did one time... the texture was not pleasant.
 
The first time I made this Mint Chip Ice Cream I could not get over how very different it was from store-bought Mint Chip ice cream. For instance, did you happen to notice that the ice cream in my photo is not green? It is the barest hint of green-tinged beige. Real mint-infused foods are not actually green.
 
While the flavor of this ice cream is undeniably mint, it doesn't taste like hyper-flavored fake mint flavoring. It doesn't shout, it whispers. It is not a blast of mint, it is a wafting of it. This is a subtle... lingering... complex... and layered creamy mint that tastes of a late afternoon in the garden at the height of summer. 
 
Which, incidentally, is right now (I don't care what the calendar says)...

Stay cool out there,
Steph

Saturday, August 29, 2020

This is (and isn't) Etegami

My first Etegami: Tomato Arrival!
Etegami means "picture letter" in Japanese and it's a charming way to send thoughts and well-wishes to friends and family. It takes very little to get started: paper, ink, watercolor, a brush or two. There are a few rules of course, but deviate from those traditional confines a little (or a lot!) and you've still got something you can proudly call "mail-art" which you can use to connect with somebody you know. And really, who wouldn't love to get something nice in the mail for a change?

At its most basic, Etegami is a handmade postcard featuring: a seasonal object outlined with a brush and black ink on absorbent paper, a few strokes of watercolor paint inside that outline, a meaningful quote/verse/thought that relates to the image, followed by a signature (hanko or chop)... and then mailed. That last bit is crucial. It must be mailed or it is not etegami. Follow-through is an integral part of the process!

What I love the most about etegami is that anybody can do it: young, old, artistically inclined or not. It doesn't have to be good... in fact, shaky, clumsy, awkward lines and dabs are not only preferred, but built-in (and frankly, guaranteed) by the way you're supposed to hold your brushes! This is an art form created for loosening up, being in the moment, and for genuinely connecting with each other.

The tomato etegami above, ticks many of the boxes for a "real" etegami, but not all. For one thing, I did not use the proper paper. Because Japanese etegami paper tends to be scarce (and/or pricey) state-side, I used what I had, which was watercolor paper. Other than that, the subject was seasonal and in front of me, the sentiment related to the both the recipient and the subject, and there were no shadows or backgrounds to clutter it up.

That was my very first etegami* and was sent to a family member who was going to be visiting us a couple of years ago. At that time, like now, our beefsteak tomatoes had just started to turn red, and their peak would coincide with the arrival of our visitor. The double meaning of the sentiment I chose is very much in keeping with the etegami spirit (playfulness is encouraged!) 

If you want to learn more about etegami, you can find an incredible wealth of generous and fascinating information at the blog: DosankoDebbie's Etegami NotebookSide Note: I have spent an embarrassing amount of time on her blog over the years, it's just such a wonderful and inspiring place to wander around in.
 
Etegami is one of those things that is paradoxically simple and complex. So, while there is plenty of enjoyment for everybody to wade around in, there are also many layers of nuance to uncover should you wish to dive deeper into it.
 
Though still not very widespread outside of Japan, Etegami is so charming and enjoyable, it is definitely deserving of a wider appreciation and participation. And don't fret about the supplies or the rules... it's more important to use what you've got and get them mailed out.
 
Another nice thing: postcard stamps cost a lot less than letter-rate postage! So now that there's nothing to stop you... Go make somebody's day!

Clumsily yours,
 Steph


*My first clumsy attempt. But remember: Etegami embraces clumsiness! Call it "anti-perfectionism" if you will. It's not about how good it is! It's real, it's immediate, and most importantly: it shows a human/personal heart and hand.

Saturday, August 22, 2020

It's Too Hot to Cook! Breakfast Edition

Easy, Healthy, and Delicious... Soaked Muesli
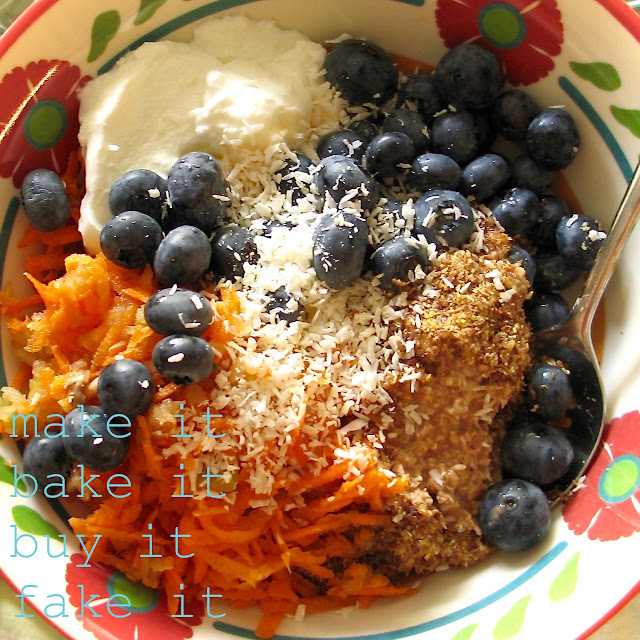
Muesli — it's what's for breakfast at my house... especially when it's too hot to cook (or I just don't feel like it).

Granola is great of course, if you have it on hand... refrigerator oats are an option too, though they tend to be too "soupy" for my liking, and have a strange texture... we've even eaten toasted oats with yogurt which was actually pretty tasty. This acid-soaked method, is an even healthier option (and possibly even easier) than all of the above.

We started eating oats this way a couple of years ago and it quickly became part of the regular rotation of breakfast favorites, especially in the warmer months. The trick to this method is a long soak in acidulated water. I'm not going to get into all the nutritional science (not my forté) but will try to explain a bit of it in basic terms. Oats contain phytates that our bodies can't break down and which prevent access to all of the available nutrients. By soaking the oats for eight to 24-hours (or more) with certain acids, those phytates are broken down somewhat so when we eat them, we get what amounts to a nutritional backstage pass.

As with most things, I found a glut of conflicting information regarding how to do this, why to do this, how long to do this, etc. So here's my caveat: I'm not a health professional. Do your research. Decide for yourself. Eat a variety of foods. Be kind to one another. Now back to our regularly scheduled programming...
 

Soaked Oats (aka Muesli for Two)

Soaking it...
Mason jar with lid (10-12 ounce cap.)
1 cup Old-Fashioned Rolled Oats
2 Tbsp Apple Cider Vinegar (ACV), lemon juice, or plain yogurt
Filtered Water
  1. Add the oats and the ACV to the jar, and top with the filtered water leaving a little space at the top. 
  2. Put the lid on and give it a good shake. 
  3. Leave on the counter until ready to eat (aim for 24 hours). I've had mine out for up to 4 days and it's fine.
  4. Shake again once or twice during the day so you feel more a part of the process.
After soaking it (before eating it)...
1/8 tsp Sea Salt
2 tsp Cinnamon
  1. When you're ready to have it for breakfast, dump the contents of the jar into a mesh sieve over the sink.
  2. Rinse well with cold water and drain well. I usually "bounce" it a few times to get as much liquid out as I have the patience for.
  3. Plop the oats into a bowl and mix in the salt and cinnamon. 
  4. Divide the oats equally into two serving bowls.
Eating it...  
I always shred a green apple into our muesli. It's a key element in traditional muesli and also makes it taste awesome. Perhaps because grating releases more juice than chopping? Other types of apples will taste good too, but the sweet/tart of the green apple plays really nicely with the other ingredients.

Split the following between the two bowls of Muesli:

1 large Granny Smith apple (or 2 small), shredded
1 cup Full-fat Plain Greek Yogurt 
Cream (or Raw Milk if you've got it)

Then top with any of these:

Fresh, Frozen, or Dried Fruits
Toasted Nuts and Seeds
Shredded Carrot
Unsweetened Coconut 
Ground flax seed meal
Candied Ginger, diced 
a drizzle of Raw Honey or Maple Syrup 
Chocolate Chips (yes, we did that)
Anything else that sounds good!
 

Why I love it...
This muesli-method of oats served us well during the fires last fall when our power was cut off for nearly week (for our safety!) and we were forced to camp out at home without a means of cooking or storing fresh food. I made four jars of it and was so happy that it didn't have to take up space in our ice chest.

As they have started cutting our power recently due to high heat (and bonus: there are fires again too!)... I thought I'd share this with you in case you are in any situation that could benefit from a super easy healthy customizable breakfast... one that you can make a day or more ahead of time... and doesn't need to be cooked or refrigerated. Perfect for weekdays, weekends, camping, and sheltering-in-place without power!


Stay safe and healthy,

—Steph


PS... I typed meusli and spellcheck gave me the option of the correct spelling or the word "slime".  Spellcheck: handy and yet so very bizarre at the same time.

Monday, August 10, 2020

Of Gaps, Gapes, and Stretchy Buttonholes (aka mending for modesty)

I have this top that’s really comfortable yet looks crisp even on hot days. It’s down to the fabric: mostly cotton with just a touch of spandex in it. Wonderful stuff that it is, it’s not always so great when it comes to buttonholes and shirt plackets. That nice bit of stretch means those buttonholes will also stretch and can result in the unexpected unbuttoning over ones bust or belly. Yikes. The other thing it does is what my Mom calls “gap-osis”: when you bend, twist, take a breath, make a gesture, put a hand on a hip, and suddenly gaps gape open between the buttons on the placket revealing things we’d probably rather not. In a word: Gap-osis.

For as long as I can remember, I’ve had tops in my closet that did this, and it’s not just the stretch-cotton tops either. All manner of button-up shirts and cardigan sweaters can exhibit this behavior. Happily I found a solution for most of them.

This won’t work on every garment that pops, gaps, or gapes, but it has so far put one of my favorite cardigans and four shirts back into my regular rotation and made me super happy at the same time. It’s such a relief to not have to think about, worry about, or fuss with my clothes as I am wearing them. No constant checking to see if the button popped out, or remembering not to make a certain move, or to wear a tank top underneath (just in case.)

Here is the trick, and it’s so simple… sew the dang thing shut! That’s it. Couldn’t be more basic, right?

Now, the disclaimer: It will only work on tops that you can get into and out of without having to unbutton them. So, nothing super tight and probably most regular cotton/woven shirts are out, but the ones with slight stretch built-in and of course, the knit cardigans… should work easily peasily.

Here’s how I approach it, plus some tips to make it as unnoticeable as possible. After all, the goal here is to avoid wardrobe malfunctions and provide peace of mind, not show off your mad sewing skills. I love visible mending, but this fix is not the place for it:

  1. Put your top on and button it the way you would normally wear it. Then try to take it off without unbuttoning it. If you can, you’re good to go. Put it back on, again without unbuttoning it first, just to double-check.
  2. Look in the mirror and decide where the gap-osis is happening the most. Usually it will be bust and/or belly region.
  3. Using pins or paper clips, mark the beginning and end of where you want your line of stitching on the placket. You’ll usually want the stitching to start and stop near a button if possible. If it doesn’t work out that way, that’s okay too.
  4. Find thread that matches the existing top stitching as closely as possible. If you don’t have any, then try to match the background color of the fabric. The idea is to make the new stitching as invisible as you can... or at least make it look like it's always been there.
  5. Decide where you want your line of stitching to go: you can stitch on either side of the placket. Each will give a slightly different look while achieving the same outcome. You'll be stitching over an existing line of stitches or creating a new line (see photo above).
  6. Practice on some scrap fabric while you adjust your machine's stitch length and try to match any existing top stitching on your shirt. You want this new stitching to blend in and be as unobtrusive as possible. Take your time with this step.
  7. Be sure to backstitch the beginning and end of your stitch line, or pull both threads to the inside and knot them securely.
Sometimes, because of the size of the buttons or width of the placket, you won’t be able to get your sewing machine needle/foot/etc close enough to sew over the existing stitch line. Maybe you haven’t got access to a sewing machine? Maybe you just need a fast fix so you can wear it right away? 
 
No worries… Grab a hand-sewing needle and your matching thread, turn the shirt or cardi inside out and stitch by hand! It doesn’t have to be quite as neat this way (bonus), but you do have to be careful to take even stitches that aren't too large. For extra stealth, sew just into the back layer of the top placket so the stitches don't show at all from the front. Watch your tension too, so it doesn’t end up puckering. Just take your time and it will be secure and invisible.

That’s really all there is to it! Gap-ectomy complete... modesty intact... closet happy!

Just sitting here stitching the blues away,

Steph

Sunday, July 12, 2020

Crochet All The Things! (ottoman cover)

...don't call it an ottoman
Hold on to your hats my friends, I've been crocheting everything for the past 2+ years and if you sit still for very long around me, I'm liable to crochet you too! Crochet is pretty addictive but the upside is how very practical it can be. It has its limits to be sure, and there are some things that are just better off knitted, but if you stay firmly within crochet's wheelhouse, there's lots of awesomeness just waiting to be made.

Since I haven't blogged about my obsession with crochet yet, I'll have to back up and share some previous projects before I can show you what I'm currently working on.

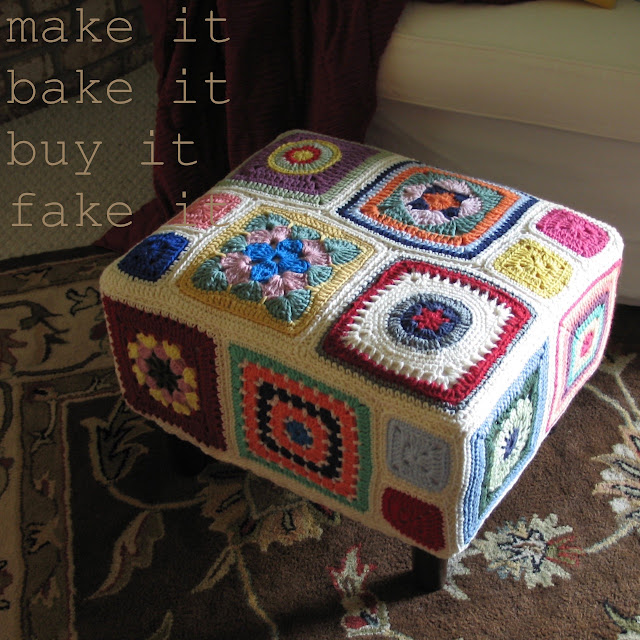
My first big project* was to make a cover for our footstool out of all my practice granny squares (pictured above). I finally finished it late last Spring and the cats immediately claimed it for themselves.

When I first started crocheting, I got loads of "how-to" books from the library and a bunch of different yarns to practice with. I ended up with a stack of truly random granny squares and no plan for them.  We certainly didn't need more blankets or sofa throws, but I hated the idea of not using them for something. Then my eyes fell on our shabby-but-not-chic footstool still wearing its aging, "temporary" muslin slip cover. Needless to say, it got volunteered.

I had no real direction or blueprint to go by in order to construct the ottoman cover. I pretty much just winged it and made it up as I went along. That should be obvious by looking. If you're interested, these are the basic steps I took...
  1. Took measurements of everything 
  2. Laid the squares out on the footstool and/or floor, and played with placement... a lot
  3. Took a digital photos when I was satisfied with the arrangement so I wouldn't forget what went where
  4. Added extra rows of crochet around any of the squares that didn't match the others in size
  5. Measured everything again
  6. Bordered all of the squares with a row of single crochet stitches in off-white yarn
  7. Connected all the squares into top and side panels with more off-white yarn
  8. Connected the four side panels to the top panel, then I connected side panels to make corners
  9. Edged the bottom with as many rows of sc and hdc crochet as needed to get it the length I wanted
  10. Wove narrow elastic through the bottom edge of it so it would stay snugly in place yet still be easily removed for washing
I should add that I binge-watched every episode of every season of Den Store Strikkedyst that I could find while constructing this. I won't link to it as I don't know if it's even still available to watch anywhere. It's just like the Great British Bake Off. Except it's Danish. And it's about knitting. It's a competitive knitting reality TV show from Denmark. I think there were eight seasons of it. No subtitles. It was so awesome.

And that's my funky-random-ugly-yet-oddly-charming footstool cover.
I love it (and so do the cats).

Keepin' it cozy...
Steph

* not including the Cloche-hat/Basketball-cozy/Shopping-bag fiasco... as it's come to be known.


Thursday, July 2, 2020

The Mended Part is Stronger

...on my mind and on the mend...
Feeling anxious about the state of things still? Yeah, me too. This may sound silly but, it's been how many months into this, and even with many of the restrictions being lifted...  I'm feeling more isolated than ever. Doesn't make sense. A lot of things don't right now. Hence the anxiousness.

I try not to put lots of links in my blog posts anymore since it's frustrating to click on them later just to find that they no longer go anywhere. However. I'm going to link to a few things I've been reading (and putting into practice) the last couple of weeks that have been helpful for me. Perhaps, if you're feeling stressed out they will be of interest to you also. . .
The important thing about diffusing anxiety, is to take an active part in it — not just reading about what works... but working it. Is there something you do that helps you to focus, get calm, or breathe easier? Do please share in the comments! After all, different moods and different days often call for different approaches.
And just so this post is not entirely dependent on all that link-y goodness, I will talk about one of the things I've been doing to keep me grounded and a little more focused. Namely, mending. That's such a humble yet potent word isn't it? So many things can be mended: socks, sweaters, broken bones, broken hearts, relationships, rifts of all kinds. 

When you mend something, you bring the torn parts back together; you make it whole again. But even more than that, it becomes stronger where the mended part is. 

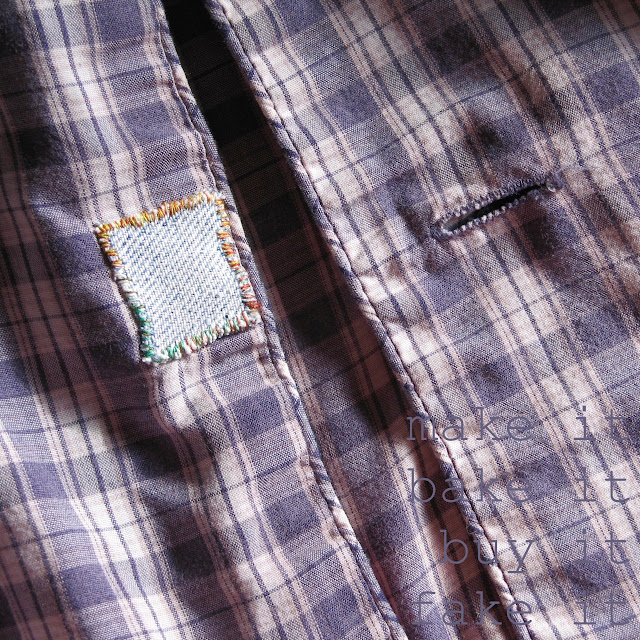
My old pajama top (pictured above), had lost its button a couple of times and each time I dutifully reattached it. The last time it happened, I noticed that the fabric under the button had ripped. I decided to mend it by sewing a sturdy patch over the torn place before sewing the button back on. Normally I'd try to blend the mend by matching the fabrics and thread as much as possible. That kind of attention to detail, while sometimes desirable, can also become a roadblock to finishing (which is the last thing I need more of). I decided that finished (and functional) is better than perfect, grabbed the nearest needle and thread, and got on with it. 

I rather like this particular mend: the thin soft cotton with its incongruously heavy little patch of denim sewn on with variegated thread. I was able to sew the button on securely and the pajamas were useful once again. I tend to like all the mends I do actually. They serve as reminders... memory markers... pats on the back... good feels... a sense of accomplishment and all that. It always feels good to fix things up.

When my pajamas are all buttoned up, the mended place is hardly even noticeable. I know it's there however, and I smile at the thought that the rest of the pajamas will eventually fall apart, but the mended place will still be strong as ever.

"Let us keep courage and try to be patient and gentle."  —Vincent van Gogh

...with ourselves and with each other, and in everything we do.

Hugs,
Steph

Monday, June 8, 2020

My Favorite Soup (and how to Ramen-ize it)

This soup is even better the next day! :)

This soup came into being about 4 years ago when I wanted to do something different with the baby bok choy in our CSA farm box. I love simply sauteing baby bok choy with garlic (so good) but sometimes I just need to change things up. At least three recipes were combined (based on what ingredients I had on hand) and I improvised the rest. It has since become one of our most favorite soups and it's always a treat when we have all of the stuff on hand to make it.

That said, like the several soups that inspired this one, it is very forgiving of substitutions. I've made it with kale instead of bok choy (not as good, but not bad), and I've even made it without the cooked chicken (still delicious but not as filling). I've made it with vegetable stock, rotisserie chicken, and dried mushrooms instead of fresh. When I had some leftover cooked brown rice in the fridge, I used that instead of ramen noodles.

The name is a mouthful, but what do you call something that is at it's most basic, Chicken Noodle Soup, but really is so much more? We pretty much just refer to it around here as "Mock Ramen Soup". It's decidedly not real ramen, but it is definitely delicious... and easy, super flavorful, and pretty darned healthy too.

Curried Chicken & Coconut Soup with Baby Bok Choy 
(and Optional Ramen Noodles)
Serves 4 large or 8 small portions

Ingredients:
2 Tbsp sesame oil
1 clove of garlic, minced
2 Tbsp fresh ginger, minced
10 oz  white button or cremini mushrooms, thinly sliced
3 bunches of baby bok choy, thinly sliced (keep tops and thicker stem ends separated)
1 tsp turmeric powder
1/2 tsp each: cumin, chili powder, and curry powder
4 cups chicken stock
1 can full-fat coconut milk
2 cups cooked chicken, chopped or shredded
juice from one small lime (or half of a larger lime)
1 good pinch sea salt
fresh ground black pepper, to taste
ramen noodles (optional, see below)
good quality soy sauce (our favorite is nama shoyu)

Optional additions (and when to add them)…
1 small red onion, thinly sliced or diced (sweat with garlic & ginger during step #1)
1 sweet potato, diced small (add with bok choy stems in step #1)
For a hit of heat try adding some Thai red curry paste (add just before the mushrooms in step #1)
1/2 Tbsp each: fish sauce + brown sugar (add at step #2, with the broth and coconut milk)
1 red bell pepper, julienned (add with the chicken in step #2)

Directions:
1. Heat oil in a large pot or Dutch oven, over medium-low heat. Add the garlic and half of the minced ginger and cook, stirring, until aromatic, about 30 seconds. Add in sliced mushrooms and bok choy stems, and cook for 3-5 minutes. When the liquid begins to evaporate, stir in the turmeric powder and the rest of the seasonings.

2. Add the broth, coconut milk, and remaining minced ginger. Bring to a boil, then lower heat to simmer. Add cooked chicken pieces and lime juice, stirring occasionally until chicken is heated through, or up to 30 minutes.

3. Add sea salt and black pepper. Stir the bok choy leaves into the pot and let them wilt for a minute or two. Taste the broth and adjust if needed. Keep it less salty though if you will be using soy sauce in the bowls.

4. Divide soup into bowls over cooked noodles, if using (see below). Add soy sauce individually, to taste. Top each serving with any (or all) of the following garnishes.

Garnishes:
fresh cilantro or basil leaves, chopped or torn
fresh chives, finely chopped
avocado, diced small 
fresh corn

Wanna Ramen-ize it?
Better noodles are certainly out there, but if you buy the instant ramen (like I do), be sure and get the square package (not the kind in a styrofoam cup), and throw away the seasoning packet—there's nothing good in there—the noodles are all we're after. Continue with the directions below.

Regardless of which noodles you use, if you're going to refrigerate or freeze some of the soup for later, cook only enough noodles for the current meal, separately, according to the package directions. Divide the hot cooked noodles between the bowls and continue with the serving step below.

Here's How:
About 5 minutes or so before serving the soup (just prior to step #3 above), drop the block (or two) of instant ramen noodles into the simmering soup pot. Let them cook, giving them a stir occasionally, until they're fat and happy. Taste test a noodle to check done-ness. Serve as soon as the noodles are ready.

Serve it up:
I generally use a big fork or tongs to pull out the cooked noodles and divide evenly into bowls, followed by a big scoop of the chicken and veggies, and finally a ladle or two of the broth over the top. Continue with step #4 above and be sure to provide chopsticks and/or forks alongside the soup spoons at the table.

...and don't forget to slurp the noodles!

–Steph

PS... I know it's summer now, but honestly, I make this whenever I find myself with enough baby bok choy. If the weather is too warm for eating soup, I leave the noodles out and freeze the whole batch to enjoy at a later date. Heck, even in the summer we get the occasional chilly evenings, and unlike some soups, the flavors in this soup really are perfect year round!


Saturday, May 16, 2020

Things I Actually Did During The Lockdown: Vol. 1

Time on my hands.


Yes, another list. It's what I do. Expect more in the future. This is an incomplete list of some of the things that I actually managed to accomplish during The Lockdown.  Alternate title: A Less Than Enchanted April in Rooms Without Much in the Way of a View is Cold Comfort Indeed!*
  • Re-read all the library books I’d picked up before this mess began. Those things are seriously overdue, but I’m pretty sure it’s okay. If I'd realized what we were in for, I would have checked out a bunch more.   
  • Gave Hubby an awesome haircut. Full disclosure: I give him haircuts even when we’re not in lockdown. This one though, really looked good! Pity nobody saw it! I also gave myself a major trim. I figured that even when I have to go out, my hair is up or in a baseball cap (so the mask ties don’t get caught in it)… nobody will see a bad trim!
  • Finished a crochet hat with a challenging pattern that I’d started over a year ago and misplaced. The bigger challenge was figuring out where I'd left off. Gotta remember not to stop mid-project like that.
  • Tested some Christmas gift ideas. In April! What is the world coming to? I'd say more but that would be telling.
  • Weeded the garden. Yes, I weeded. Totally not joking, I really did. And then, after getting up close and personal with the little darlings, had to find out what they’re actually called and other non-pertinent information about them. Because I could. And it was the least I could do after unceremoniously ripping them up by their invasive %$#@!& roots.  My favorite weed? The Redstem Storksbill!
  • Did some reading up on the habits and habitats of our local feathered friends. We had an Oak Titmouse family in our front yard birdhouse. I could watch their comings and goings as they “feathered their nest” and fledged their young. Forget the Lion King, we've got the circle of life right here in our front yard. And it's awesome.  
  • A bit of clutter clearing happened. Then the sun came out! After a cold grey winter, I've pretty much planted myself on the porch to soak up as much heat as possible. Not sun, heat. There is a difference. Might do some more de-cluttering now that the fickle weather has turned on us once again.
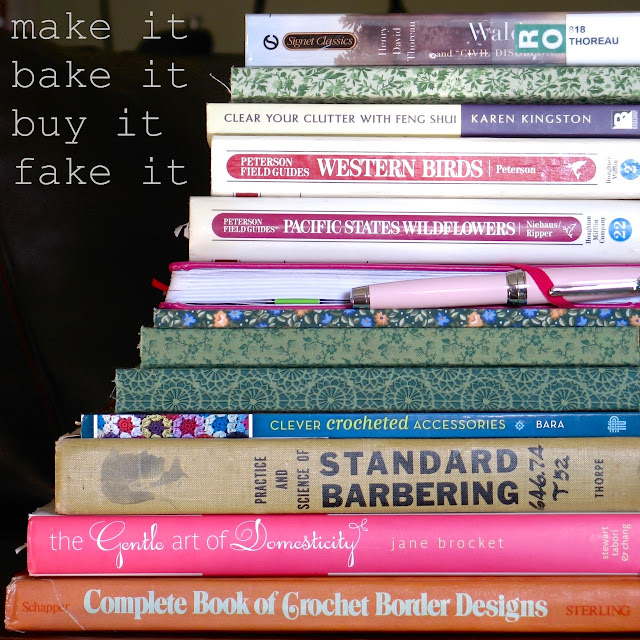
  • With the libraries still closed, and you know, a swirling vortex of stress, I turned to my favorite novels for comfort and escape. They’re the ones in green print cotton covers in the photo above. Re-reading them is like therapy. No, it's more like a special treat; a visit with an old friend. I don’t like the look of paperbacks, so to cover up the sometimes damaged (sometimes ugly) covers, I glue fabric over them. It’s pretty and it reinforces the cheap paper covers.
So that was April. This is May. May is thus far just like April. But if I look closely, there are some positive changes happening….

Cheer up, Buttercups!
—Steph

*Three of the top favs: Enchanted April by Elizabeth Von Arnim, A Room With a View by EM Forster, and Cold Comfort Farm by Stella Gibbons. These also have the distinction of having had excellent movies made from them with stellar casts. The same can not be said of all my favorite novels.

Sunday, May 3, 2020

Spring Means Cherry Cake Weather

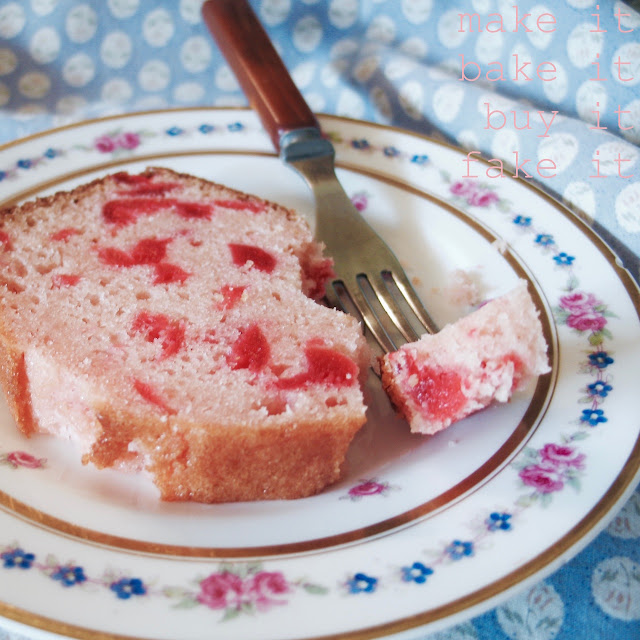
Cherry Tea Cake on pretty vintage plate
or... What to do with that glowing jar of maraschino cherries hiding in the back of the pantry (other than topping bowls of ice cream)

It's still Springtime. I can tell because the bugs are fully activated, the weeds are on steroids, the wild onions are in bloom, and there are still a few cherry trees festooned in their floral finery in our neighborhood. Not many, and not for much longer, but a few nonetheless. Pretty sure the late-bloomers are the Kwanzan variety (one of my favorites). I had meant to post this in March or April when all the other varieties of fruit trees were showing off too, but things were starting to get weird in the world and blogging was not my focus.

We don't have cherry trees in our yard anymore, but we do have a crab-apple tree that came with this house, and when it comes to blossomy spring beauty, it's a close second to the cherry trees. Most of the year it's a nondescript unattractive old thing, showing its previous decades of neglect. For three to four weeks out of each year though (usually in March), it's a real stunner. A profusion of dark pink buds start the show and soon burst into pale pink blossoms that finish off creamy white before dropping their petals, swirling and fluttering to the ground, like springtime snow-flurries, with each passing breeze.

The color of this cake reminds me of those pretty buds and blossoms that every year herald the coming spring. The color is achieved by the inclusion of maraschino cherries and specifically, the "liquid" they live in. I won't go into how very unnatural the color of these jarred cherries is or what non-nutritive chemicals could create such a vivid hue, nor why you might want to avoid ingesting these things too terribly often. I'm a "waste not, want not" type of person, and even though they're not healthy, they are still sort of like food and need to be used if at all possible.

The reason we have a jar of maraschino's in the pantry at all is because of a sweet and wonderful Christmas tradition in my hubby's family. And now I have found the perfect thing to use them for. Don't get me wrong, we've had no problem at all using them to adorn bowls of ice cream every year! But next Christmas when I thank my mother-in-law for another jar of cherries, I will look forward to making this cake again.

When our crab-apple starts to bloom (or the neighbor's cherry trees, or all those darned wild onions, or frankly, whenever I feel like making a pink cake), I'll say, "It looks like Cherry Cake weather!"* and reach into the pantry for that jar of maraschinos, vivid with love, family, and memories.

Cherry Tea Cake
adapted from: here, here, here, and here

ingredients:
1 16-ounce jar maraschino cherries
1 3/4 cups All Purpose Flour (+ 2 Tbsp, reserved)
1 cup sugar
2 tsp baking powder
a good pinch of salt
2 large eggs
1/2 cup light olive oil
1/4 cup milk
1/4 cup maraschino liquid
1 Tbsp vanilla extract

directions:
Preheat oven to 350°F. Grease a standard 8.5"x 4.5" glass loaf pan.
  1. Drain the cherries well, reserving their liquid. Put the drained cherries in a small bowl lined with a couple folded paper towels, set aside.
  2. Whisk together the flour, sugar, baking powder and salt in a medium bowl. 
  3. In a separate bowl, add the eggs, oil, and the rest of the liquids. Mix well.
  4. Combine wet and dry ingredients until just incorporated.
  5. Give the cherries a few chops, then toss them with 2 Tbsp flour until coated (this prevents the cherries from sinking to the bottom while it's baking). 
  6. Fold the cherries into the batter and pour it into the greased loaf pan. Bake for about 70 minutes (start checking after 50 though, as ovens and pans vary).
  7. If you notice the top of the cake getting too dark too early, make it a little hat out of foil and perch it over the top of the pan.
  8. Cake is done when it tests clean with a toothpick in the very middle. 
  9. Let cool in pan for 15 minutes, then carefully tip it out and finish cooling it on a rack.
My Notes...
  • This cake goes together really fast. No mixer needed, just a whisk and a spoon. 
  • Almond extract can be substituted for the Vanilla in whole or part if you like. 
  • Powdered sugar or cream cheese glaze would look nice over the top of this cake if gifting or taking to a party etc. Save a little bit of the jar liquid to tint the icing pink. I find that the cake is plenty sweet on its own, so I don't bother to frost it if it's just us eating it. 
  • The cake can be frozen (unglazed) if wrapped well. 
  • You can bake two mini-loaves instead for gifting (bake time will be shorter), or even make pretty pink cupcakes! 
  • If you use a metal loaf pan, the baking time may be different. 
  • And lastly, if you're sensitive to red food coloring, you'll want to just stay away from this cake altogether.
Happy spring, late bloomers!
–Steph

P.S. This essay would have worked so much better if we still had a cherry tree in our yard (or if I'd managed to post it six weeks ago). But this is me, doing my best with what I've got (and missing my old cherry trees a little also, I think).

*An homage to Truman Capote's short story A Christmas Memory, about fruitcake and family ("It's fruitcake weather!"). If you haven't read it before, do so in November or December for the right ambiance.  

Saturday, April 25, 2020

Things are Weird… but It's Going to Be Okay

Sleepy smiling kitten not worried about a thing... on makeitbakeitbuyitfakeit
As a crafty/DIY-type of introvert with more unfinished projects than time to do them all, there are some aspects of this “Shelter-In-Place” and Social Distancing-thing that make me want to just say, “Hey, welcome to my world everybody!”

But then there are the overwhelmingly serious aspects of this situation… and then there are The Fears… The Uncertainty... The Isolation... The Horrid Media Coverage... The Stats... UGH. And while I rejoice that some restrictions may be lifting soon, the weirdness will continue for quite some time.

I don't know about you, but I need to focus on positive things to keep my mood from spiraling. Lately that's a real challenge. So, while boredom is not in my vocabulary even in the best of times, I made a list of things to work off of when I do lose focus (or start to focus on the cruddy stuff). Plus making lists calms me.

My Big Fluid List of Possible Things to Do During the Lockdown (in no particular order)

Practice my penmanship
Go for a walk in my neighborhood
Embroider something
Putter in the garden
Re-read a favorite book or two (or three...)
Make a dent in my craft supplies
Start a new art journal/work in my "altered book"
Write “morning pages”
De-clutter a closet/dresser/room
Watch movies and TV shows that make me feel good/laugh
Listen to old radio shows (online/streaming)
Mend stuff
Play board games/card games
Organize/purge my digital photos
Make music playlists (I can kill a ton of time this way)
Rearrange the furniture
Do a real Spring Clean
Make meal plans
Clean out my fountain pens
Write letters and cards to friends/family
Bake and cook (even more) stuff from scratch
Practice “belly breathing”

I've been staying off the internet/TV/social media for the majority of each day. It really only takes a few minutes to get what little important info there is (the rest of it is just a depressing rabbit hole).

The main thing right now is to take care of ourselves: mind, body, and soul. Sometimes that might mean watching cat videos all morning in pajamas and eating ice cream straight from the carton. But only sometimes.

What’s on your list? What have you been doing to keep happy and healthy lately?

—Steph 

Thursday, April 16, 2020

Happy Bizarre Stuck-At-Home Birthday!

My "Locked-Down" Birthday Card for Spring of 2020
Springtime is what I usually refer to as "birthday season". We have so many friends and family members with birthdays that fall in the March-April-May time frame. This year of course, things are no different. Except of course: no birthday parties, dinners, get-togethers... no birthday hugs, kisses, toasts... and certainly no blowing out of birthday candles on any birthday cake. Likely that's not going to change for a while. That means there's a whole lot of bummed out birthday boys and girls out there! So I did what any crafty person would do and made a topical birthday card, not to celebrate the situation, but to celebrate within the situation.

This is the new now kids. We're just gonna have to make the best of it and have one heckuva bash when we're past all this someday.

In the meantime. . . I wanted to make a card that basically said, “This birthday will be like no other you’ve ever had!”. I wanted it to be special and a bit playful. Hopefully it succeeded! Each one took a fair amount of time. I could’ve scanned it and printed out multiples, but I don’t have a scanner. What I do have is time (and lots of it!).

Though the design is 100% me, much of the inspiration for this timely birthday card has grown from years of crushing on the super-creative blog The Postman’s Knock. Go check it out and prepare to get inspired from all the great tutorials and ideas there: mail-art, calligraphy, watercolors, pens and inks, and more!

I can't believe how long it's been since I've posted here. That's something I'll have to remedy... one more thing to add to my "lockdown to-do list"!

Have an unforgettable birthday Spring babies! This is one for the history books.

-Steph