
Back in high-school, the only mainstream retail line of clothing that I remotely cared about, the only one that I sought out, the one I'd save up my allowance for... was Esprit. There was something so appealing in their fun fresh euro-chic look back then. I only had a few pieces, but I'd chosen them with care and I wore the heck out of them. Highlights of my collection included: a black lambswool sweater vest, a cute pair of white penny-loafer-type flats, a black and white polka dot pleated skirt... and a charcoal grey ribbed wool crew-neck sweater.
Esprit De Clutter
I kept that charcoal grey sweater long after it stopped fitting me and even after the moths had invited their friends over for lunch. I don't know why, but I just couldn't let it go. To look at it was to remember. It's dark neutrality transitioned easily between all my styles and it's simple shape transcended all trends... a true classic. Did I mention how soft and comforting it was? Just like a hug. If you had come back in time and told me that when I grew up I would intentionally shrink and cut up that sweater and then stuff it in my shoes, well, I would have totally called you a dweeb. I'm so sure.
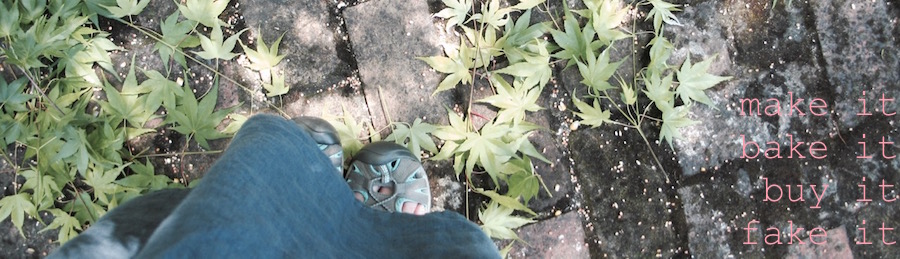
What you see up there in the upper-left side of the photo are indeed the former sleeves of that very same sweater from my past. I figured that if it was going to take up space in my home, and could no longer be worn... maybe it could be put to use in some other way. The first thing I did (to stop the moth picnic), was to felt it. That's a verb. It means "to make felt". It's really hard to do: you run a 100% wool knit garment through the washing machine with soap and hot water and follow that with a tumble in a hot dryer. Ta-da! Wool felt. Thick and soft, and if you cut into it, it won't ravel. Gorgeous stuff.
Toes... Cold... Ugh!
I have a pair of faux-Ugg boots that are still in great shape even after six years. Great shape except for the insoles, which are actually in o.k. shape except that most of the cushy stuff is all worn away and the rest is flattened into oblivion. In short.... the boots aren't as comfy as they once were and cold radiates right up through the soles. And as you know, when your toes are cold, all of you is cold. Truth.
Enter the synchronistic genius of maya*made and her diy replacement insoles for snuggly toes. Starting with her directions, I adapted them to fit my materials on hand and my budget of $0.00 (zero). Here's what I did:
Felted Wool Insoles á la Maya
- Take out the old insoles.
- Trace them onto thin cardboard to make templates.
- Use templates to cut as many layers of wool felt as you need.
- Stack and stitch the layers of wool together, if using more than one per insole.
- Stuff them into the bottom of the boots.
- Wiggle your warm toes with satisfaction.
Notes: I used two layers of my felted sweater wool for each insole I made. I marked the templates with R and L and noted which boots they were for in case I want to make more. I used a sewing machine to stitch the layer together but hand stitching would've been easier due to the thickness of the felt. I'm keeping the old insoles inside my boots and putting my wool liners on top of them since they had a bit of arch support that I wanted to keep. After wearing them for a month or so now: I still love them and am thinking of adding another layer of felt. Best of all, I can just toss them in the wash if they ever need it. Here's to warm happy toes!
Are you still holding on to some cherished iconic piece of clothing from high school for no apparent reason (or am I alone here)? Do tell!...
Are you still holding on to some cherished iconic piece of clothing from high school for no apparent reason (or am I alone here)? Do tell!...


0 COMMENTS:
Post a Comment
Take a moment to say "Howdy!"... I'd love to hear from you!